Happy New Year everyone! We enjoyed a little break for the holidays but Madelynn has been asking for school every day since Christmas so we are jumping right back into our preschool routine. It has been below zero almost every day this week too so I am glad I had some fun winter themed activities planned to keep us from going stir crazy!
**This post contains affiliate links for your convenience. View our full disclosure policy here.**
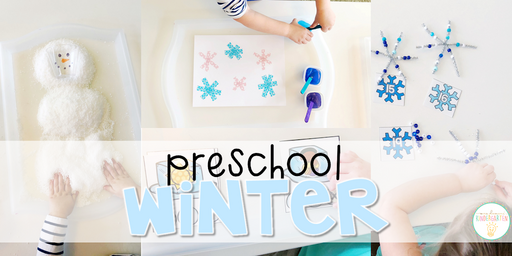
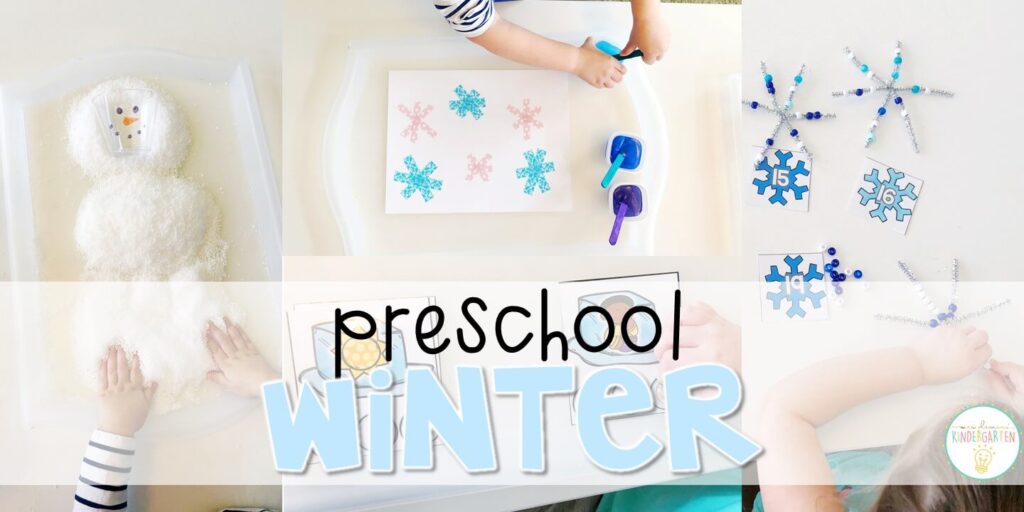
Here were our plans for our Winter theme:
And here are the details for each activity:
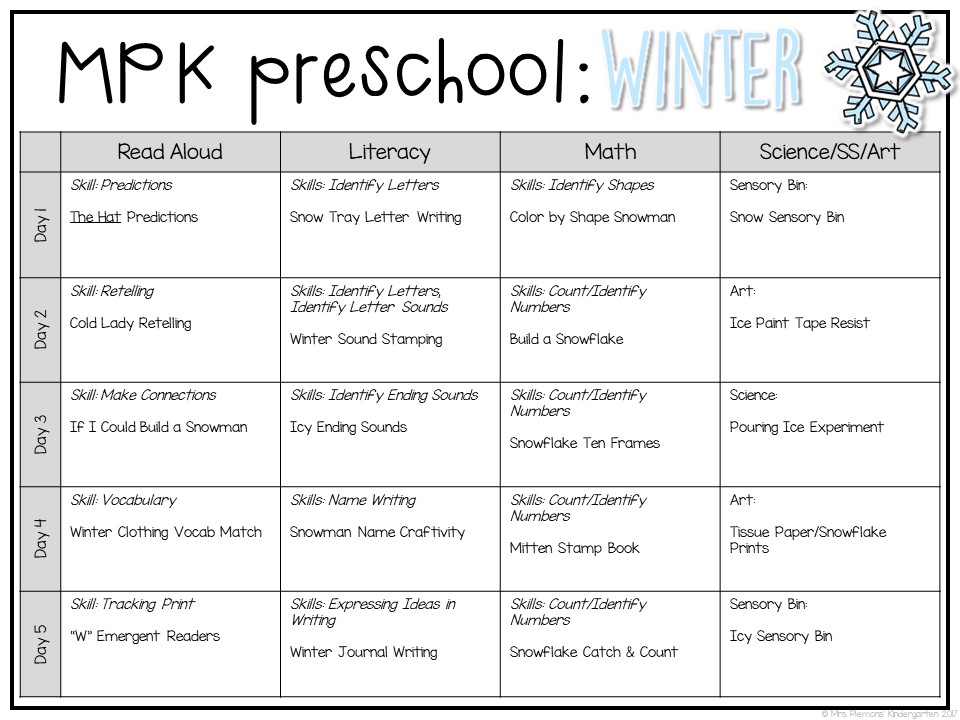
Making Predictions:
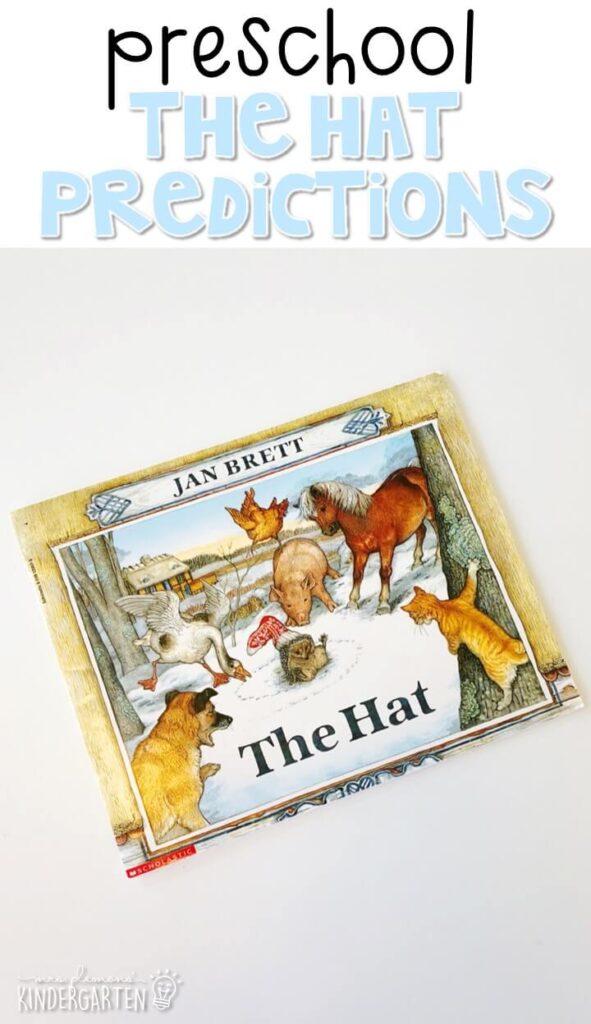
Our first story was The Hat by Jan Brett. Before reading, we practiced answering questions and making predictions.
I asked “After looking at the cover, what do you think this story will be about?” Madelynn: “I think a porcupine will go in a hat and all the other animals will go in and get poked.”
We love Jan Brett in our house and just finished reading The Mitten which probably explains Madelynn’s prediction. Also I love that she didn’t know what animal it was on the cover and guessed porcupine, which meant we’d have a good teachable moment learning the word hedgehog.
Cold Lady Retelling:
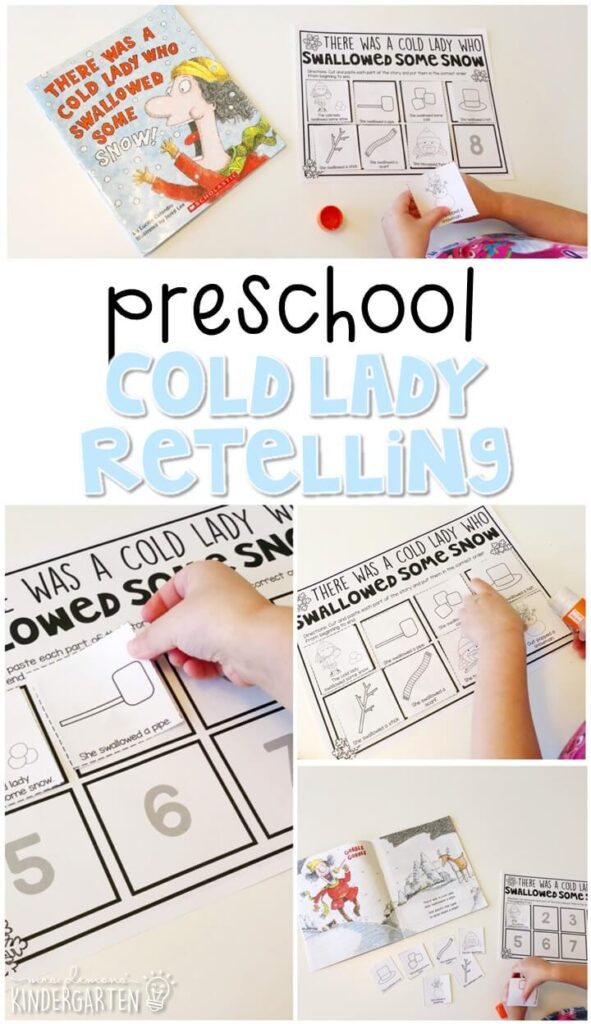
Our next story was all about our favorite silly old lady, There Was a Cold Lady Who Swallowed Some Snow by Lucille Colandro. We started by reading the story. After reading I gave Madelynn 8 pictures from the story with simple sentences underneath. We read through them all together and then I prompted her to find what happened first, second, third, etc. She then glued them to her page in the correct order to retell the story. I kept the book nearby so she could check the pages if she was stuck, and it was also an easy way to double check her work.
If I Could Build a Snowman:
Next we read Snowballs by Lois Ehlert. While reading, we talked about all of the materials the author used to make each snowman. Then I asked “What would you use to build a snowman?” Madelynn decided she was going to make Frosty the Snowman (we had just watched the movie a week or so ago). After drawing the details in her picture I asked her to write her snowman’s name and she wrote “FF.”
Winter Vocabulary Match:
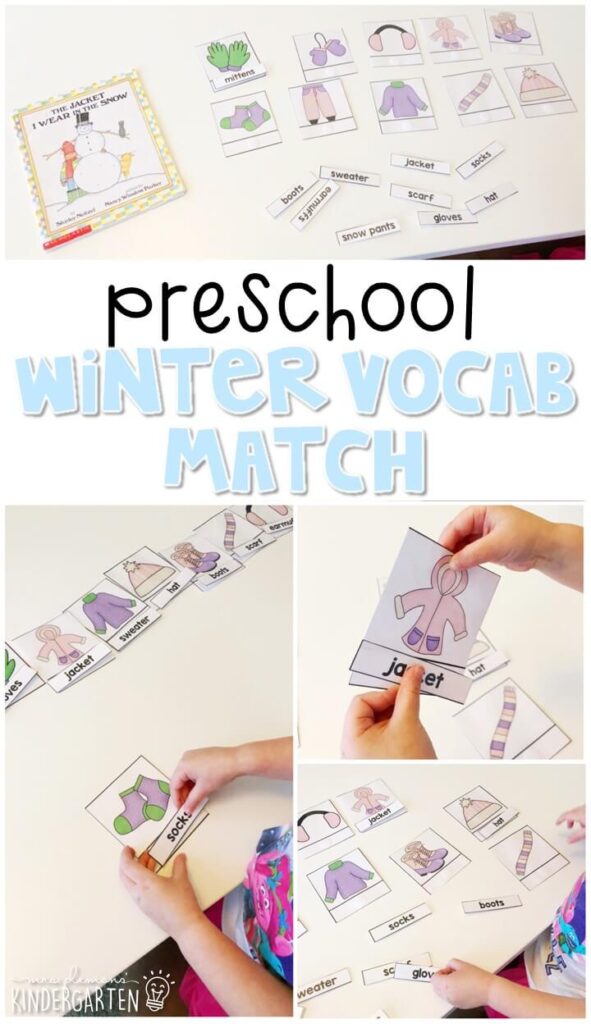
Our next book was one of my favorites, The Jacket I Wear in the Snow by Shirley Neitzel. The fun rebus style and repetition of this book make it a great anchor book for learning vocabulary. After reading we used cards to match winter clothing words to pictures. I helped emphasize the beginning sounds so Madelynn could find and match the correct word to the picture.
Tracking Print:
Our last book was this It is Winter book from our Scholastic Guided Science Readers set. Madelynn is starting to read easy level A books with patterned text. This book is a level B, so she read the “it is winter.” sentence on each page, and I helped her with the second sentence using picture clues to read the words.
SnowLetter Writing Tray:
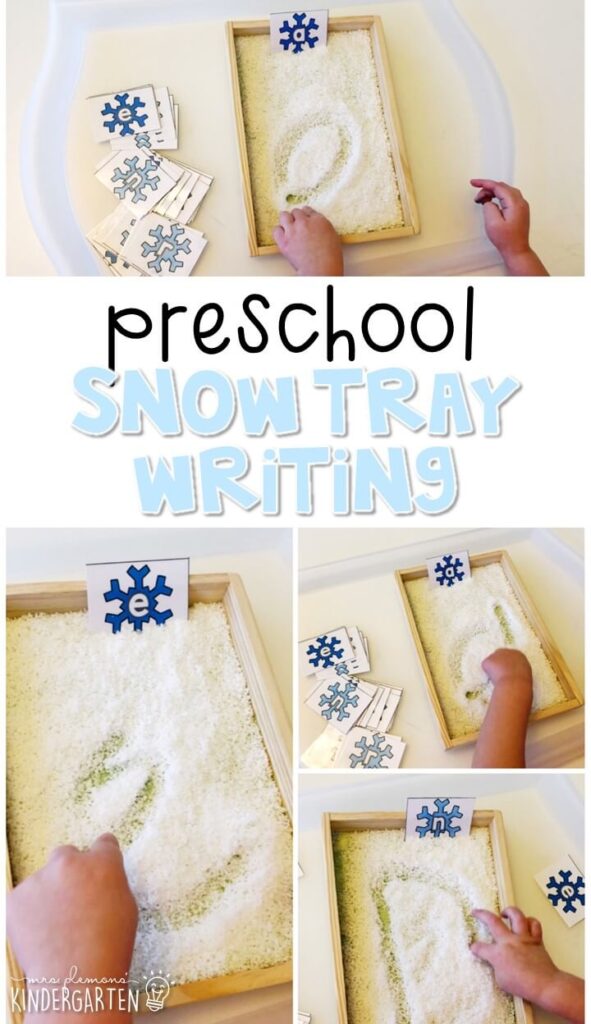
Our first literacy activity this week was a winter snow themed letter writing tray. To make this fun winter activity I filled our shallow tray with instant snow. Madelynn used snowflake letter cards as a model and chose which ones she wanted to practice. If you haven’t played with instant snow before it is super fluffy and cool like real snow. It was a really fun way to switch up our normal sand/salt tray.
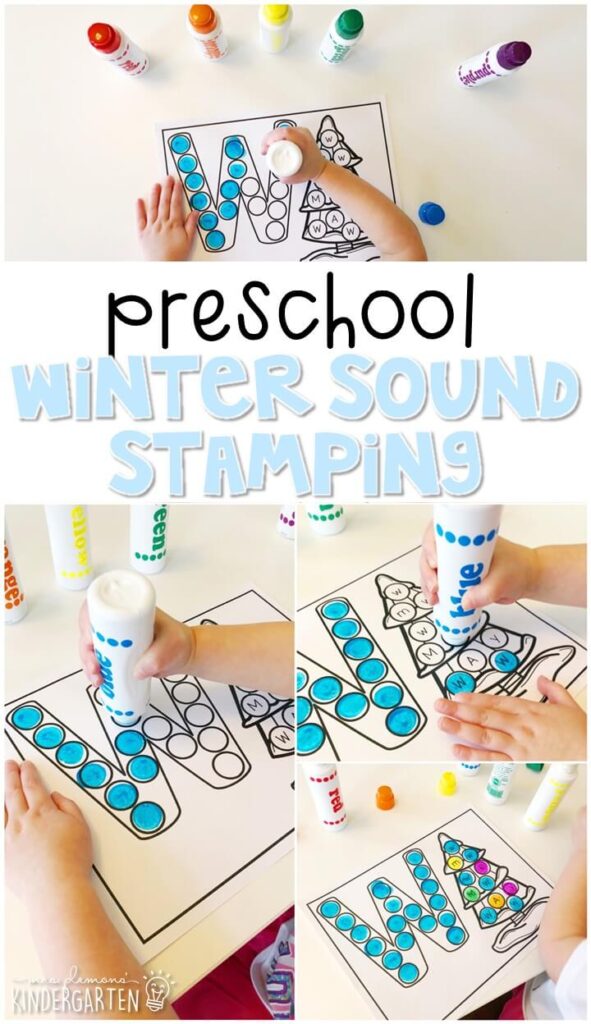
Winter Sound Stamping:
Next, for more letter practice we used our dot stampers. We started out stamping inside the letter to make a W. Then Madelynn had to find the upper and lowercase w’s in the winter tree, stamp them and make the “W” sound each time. Then she stamped the other letters different colors and tried to make the sounds for each one.
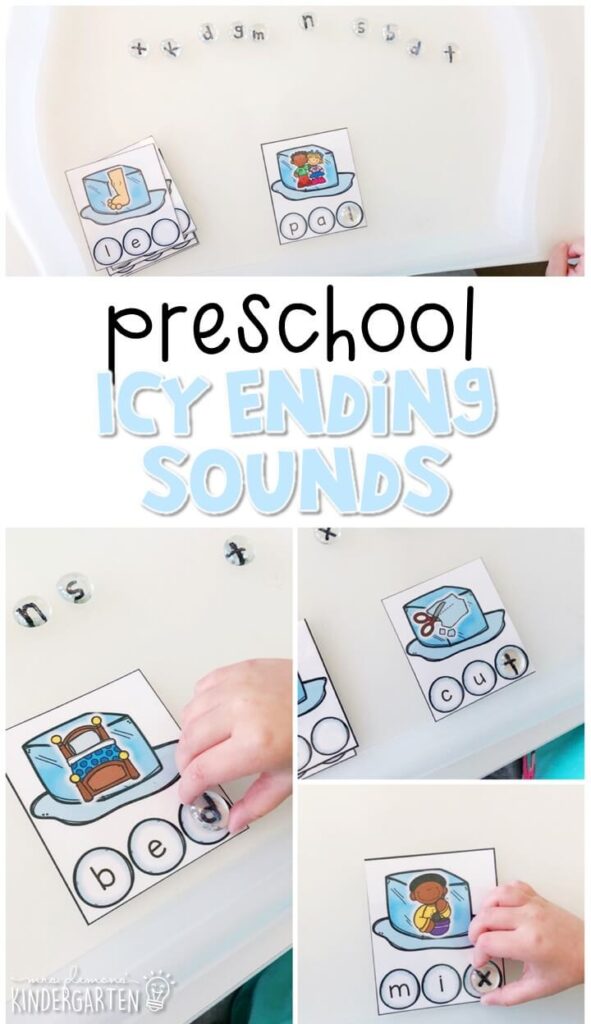
Icy Ending Sounds:
This week we began to focus on ending sounds in words. Madelynn has been really focused on beginning sounds for a while now and isn’t hearing the other sounds in words especially when writing. (She’ll usually hear the beginning sound and write it over and over like when she wrote FF for Frosty.) Madelynn choose an icy picture card and identified the picture. I helped her say the word slowly and she slid her finger under each letter snowball. I had her listen for the ending sound and then she filled in the missing sound with a clear gem letter.
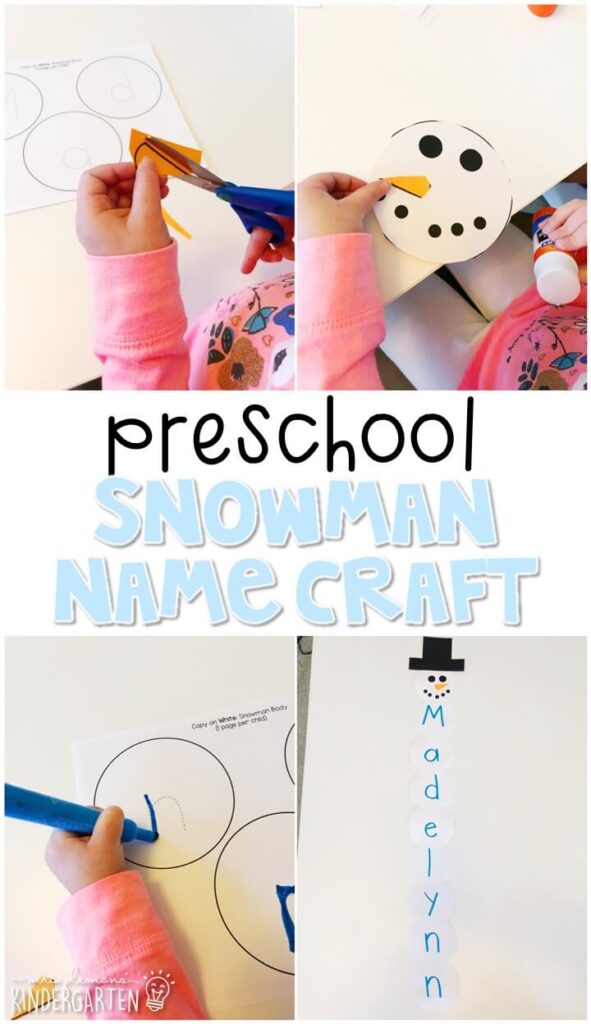
Snowman Name Craft:
For this week’s name craft we created this adorable snowman. First Madelynn cut the snowman pieces out. Then she traced the letters in her name on each part of the snowman body. After she finished writing, she glued the snowman pieces together and added the snowballs under the head in order to spell her name.
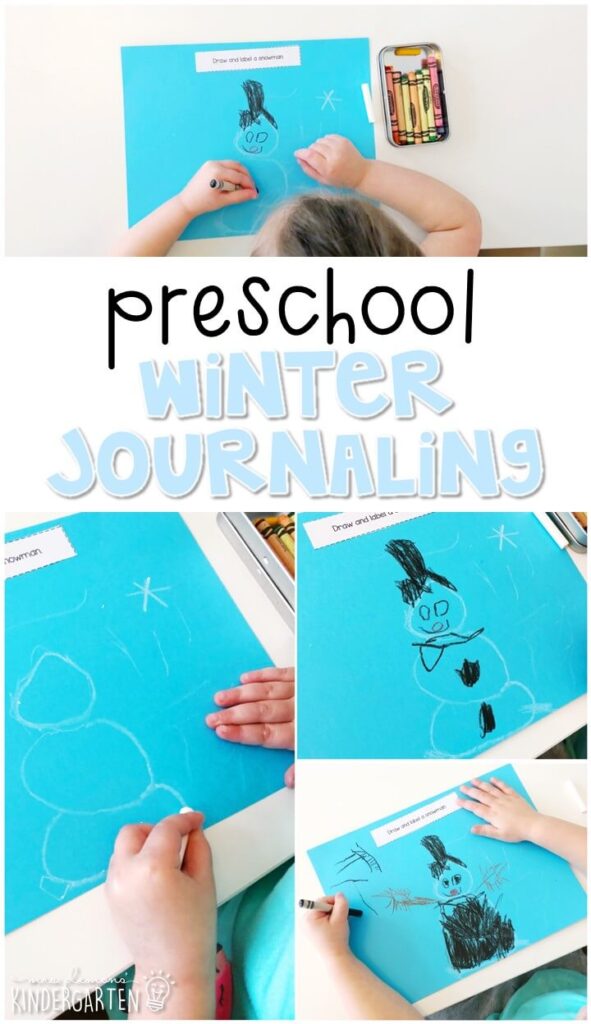
Winter Journal Writing:
For our journal this week Madelynn chose to draw and label a snowman. Of course she decided to draw her favorite snowman buddy Frosty again. This time I encouraged her to really listen for other sounds after the first “F” sound. She wrote “FT” so hooray for learning ending sounds!

Color By Shape Snowman:
Now that Madelynn is excellent at counting and identifying numbers to 10, we are switching up our focus for our color by the code activities. For this week’s color by code activity Madelynn worked on identifying and naming shapes. I told her the color for each shape and she had to search and color each one in the picture.
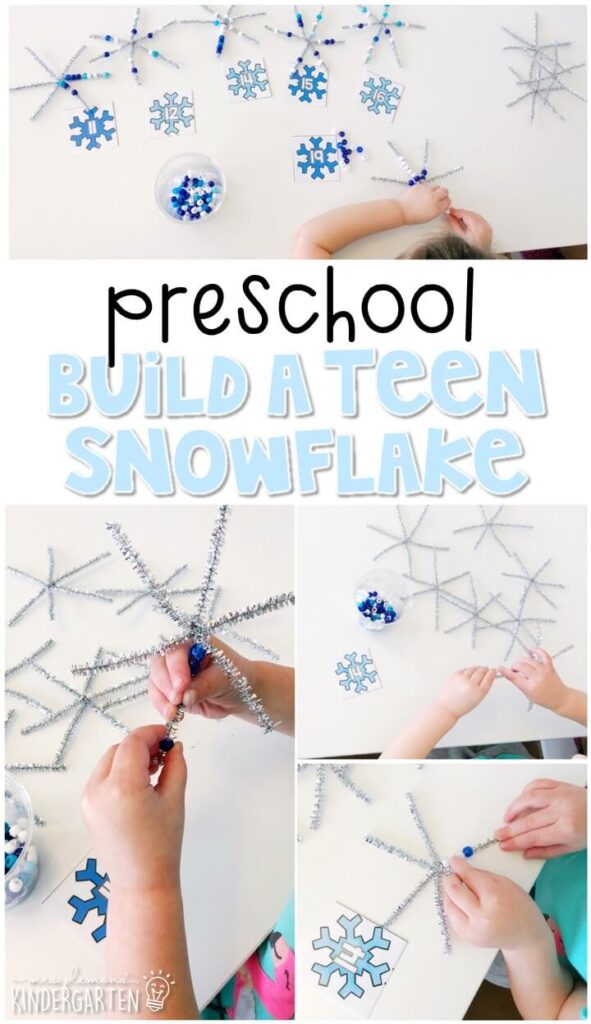
Build a Teen Snowflake:
This week in math we are working on teen numbers. Madelynn has been doing great with identifying numbers 11 through 20 but still struggles to count out 11 through 20 objects (because you know 4 year-old attention span) So I put together this count and build snowflake math activity. I twisted 3 pipe cleaners together to make a snowflake. Then I gave Madelynn a bowl full of pony beads and snowflake number cards. She chose a card then added that number of beads to each snowflake.This week in math we are working on teen numbers. Madelynn has been doing great with identifying numbers 11 through 20 but still struggles to count out 11 through 20 objects (because you know 4 year-old attention span) So I put together this count and build snowflake math activity. I twisted 3 pipe cleaners together to make a snowflake. Then I gave Madelynn a bowl full of pony beads and snowflake number cards. She chose a card then added that number of beads to each snowflake.
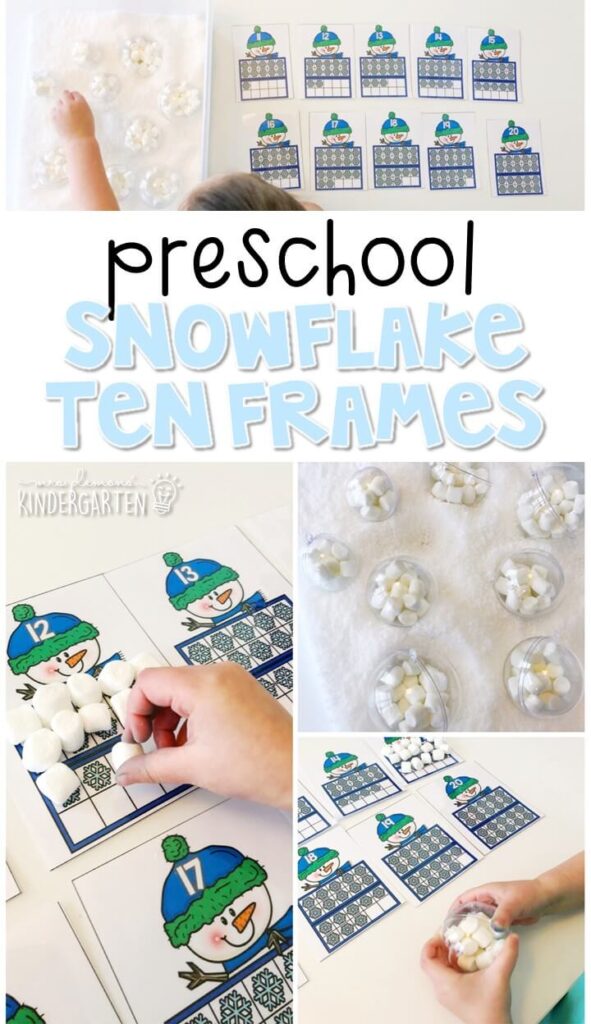
Snowflake Ten Frames:
For this activity I started out by filling plastic ornaments with marshmallows in quantities of 11-20.
Madelynn choose an ornament, poured them out, then counted them. For additional number recognition and fine motor practice, she had to find the matching ten frame card and place the marshmallows on each snowflake.
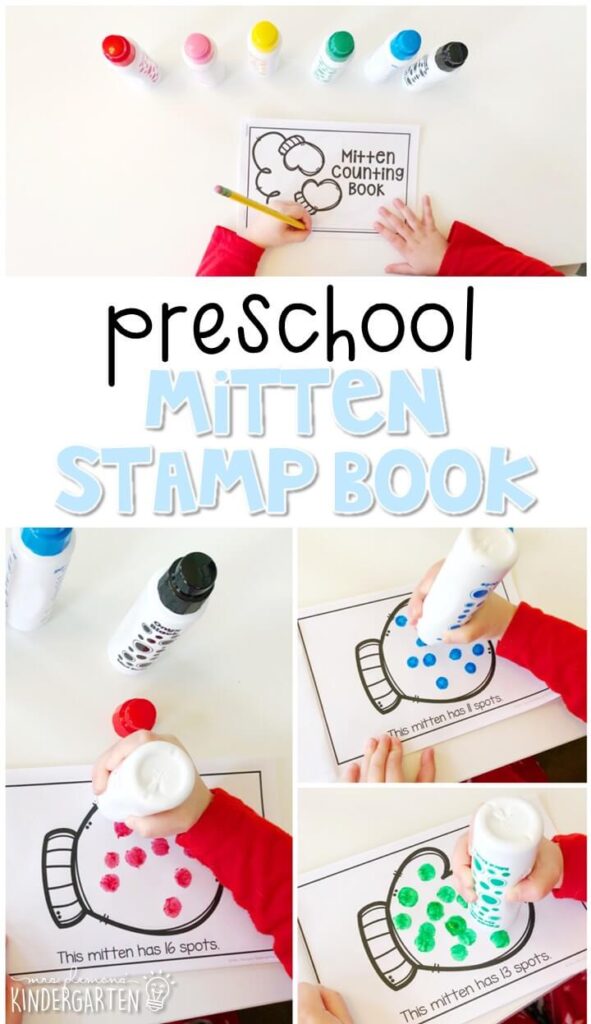
Mitten Stamp Book:
Our next number sense activity was a mitten stamp and count book. I helped Madelynn read the sentence on each page. Then she used mini dot stampers to add the correct number of spots to each mitten. The mini stamp markers were perfect for stamping quickly while counting.
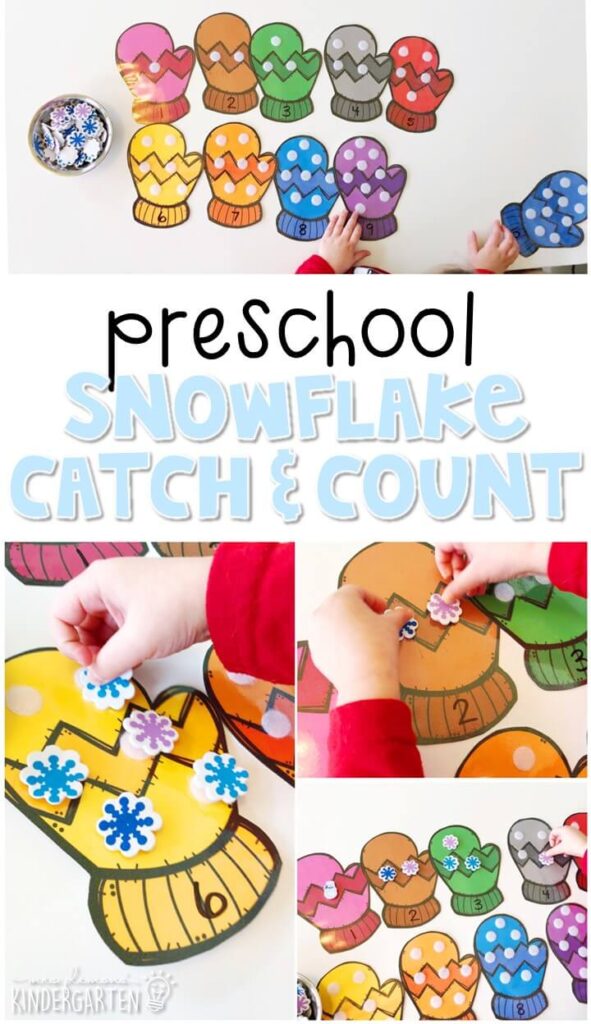
Snowflake Catch & Count:
For our last number sense activity we reinforced the numbers 1-10 because you can never have too much practice right? Madelynn counted and velcroed snowflakes to each mitten to catch the correct number of snowflakes.
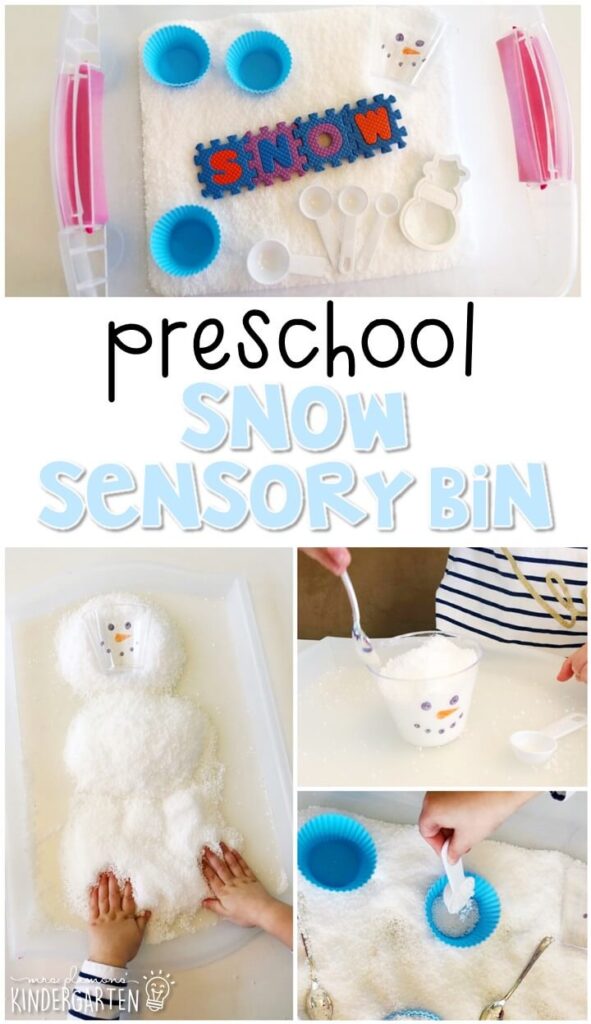
Snow Sensory Bin:
In this bin: instant snow, clear snowman cups, scoops, snowman cookie cutters, cupcake liners, puzzle “SNOW” word
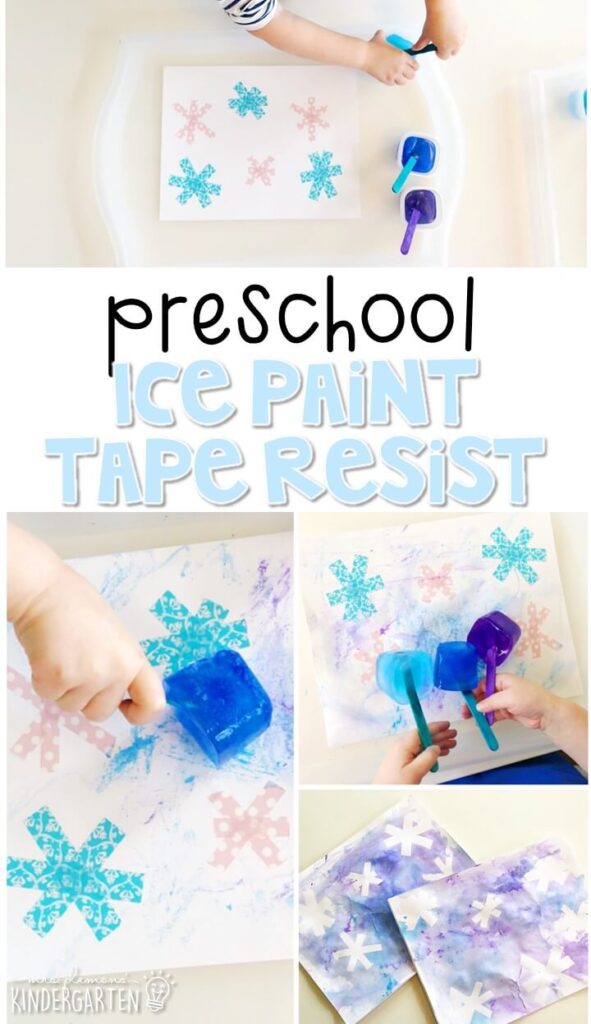
Ice Paint/Tape Resist Snowflakes:
For this art activity I dyed water with liquid watercolors and froze them into blue & purple ice cubes with popsicle sticks in them. Then I taped snowflakes on cardstock with washi tape. Madelynn used the colored ice to paint over the snowflake shapes. After a bit of painting, I helped to remove the tape and reveal . *Be careful not to let the paper get too soaked or the tape will be hard to pull off without ripping the paper.
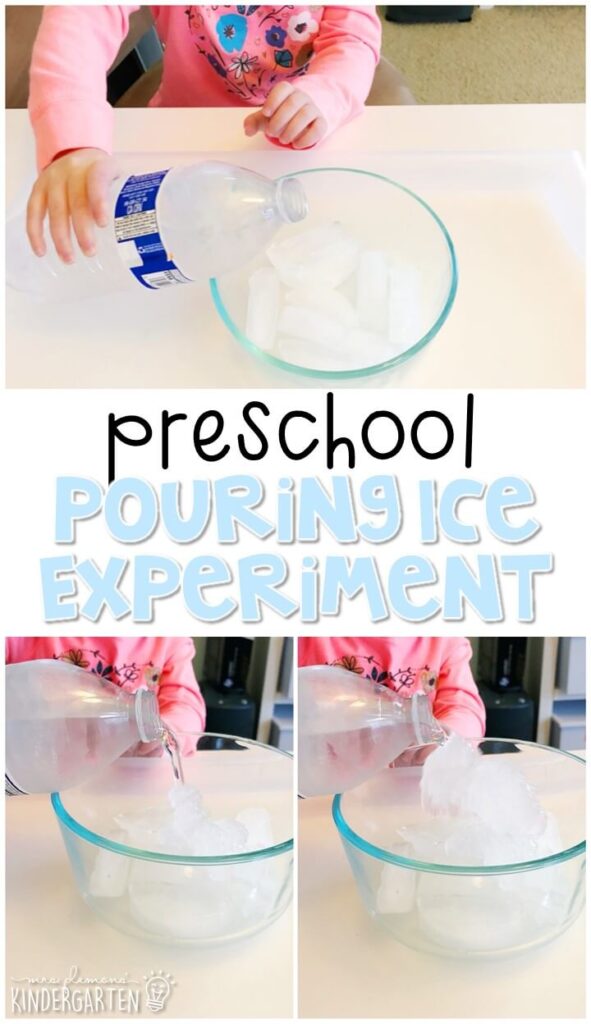
Pouring Ice Experiment:
This science activity took a bit of trial and error and prep time, but was totally worth it. First, I placed a bottle of water into a bucket and packed ice around the base. Then I poured salt over the ice and topped it with water to the bottle’s lid. Next, we let it sit for about 30 minutes (until the temperature was approximately 17 degrees.)
When I told Madelynn it was time, she carefully removed the bottle while I placed ice cubes in a mixing bowl. After I removed the cap, Madelynn slowly poured the water over ice cubes, and watched as an ice tower formed like magic.
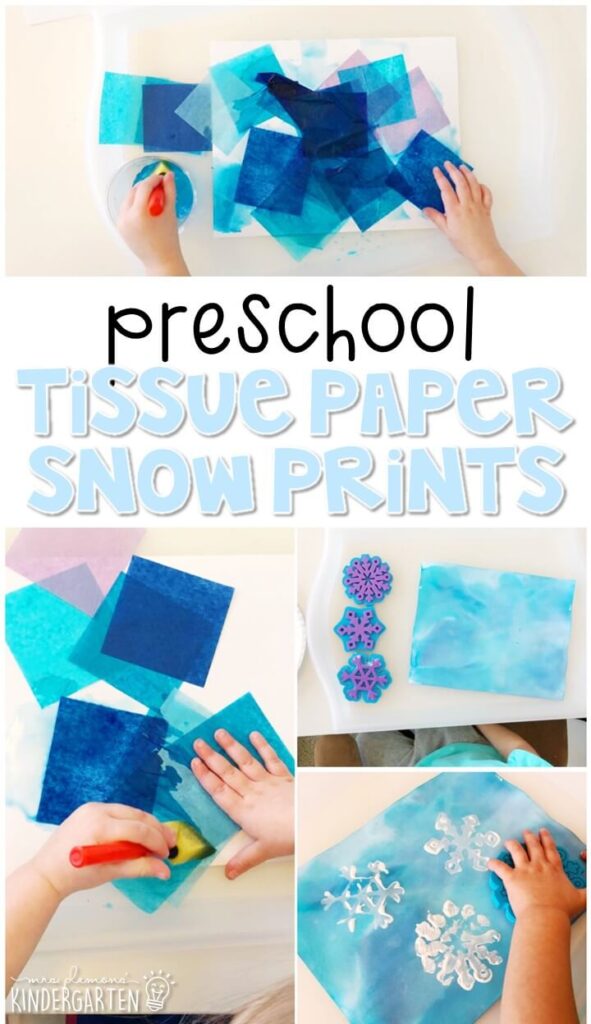
Tissue Paper Snow Prints:
I’m loving how this pretty wintery craft turned out. Madelynn placed bleeding art tissue paper squares on top of white cardstock. Then she painted water on the tissue squares to color the white paper. After we allowed the paper to dry we easily peeled off the squares to reveal a gorgeous water colored background. Finally she used white tempera paint to stamp snowflakes on the colored paper.
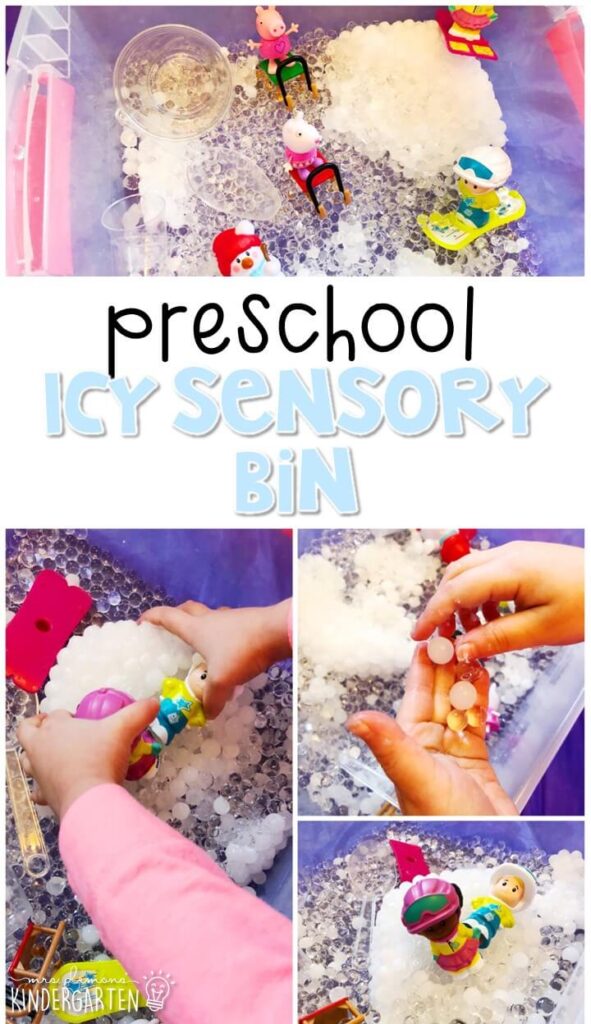
Icy Sensory Bin:
In this bin: frozen water beads, cups, scoops, winter Little People
Want all of this week’s Winter activities for preschool? You can grab them here:
On my site : Winter Plans & Printables On TpT: Winter Plans & Printables
Or you can grab our entire year of themes and plans:
On my site here: Preschool Bundle On TpT here: Preschool Bundle
Then check out the rest of our 45+ themes on the Preschool Curriculum Main Page.


Will you have the remainder of January – May Preschool Calendar Available
I’m so glad I found this, my daughters are going to love trying these. Thanks for sharing
How did you freeze the water beads without all of them sticking together?
I laid some flat in a tray, but they did stick together in clumps!