Do your kids love dinosaurs? I feel like nearly every child (and most adults) find dinosaurs fascinating. We spent this week enjoying all kinds of preschool dinosaur activities to learn more about them.
**This post contains affiliate links for your convenience. View our full disclosure policy here.**
Here were our plans for our Dinosaur theme:
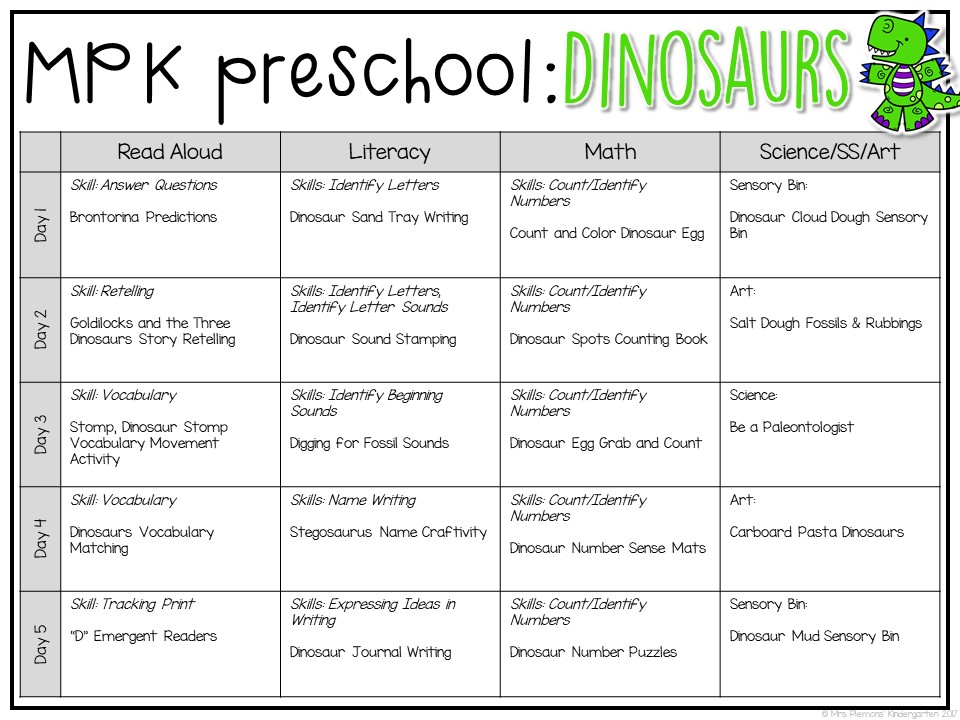
And here are the details for each activity:
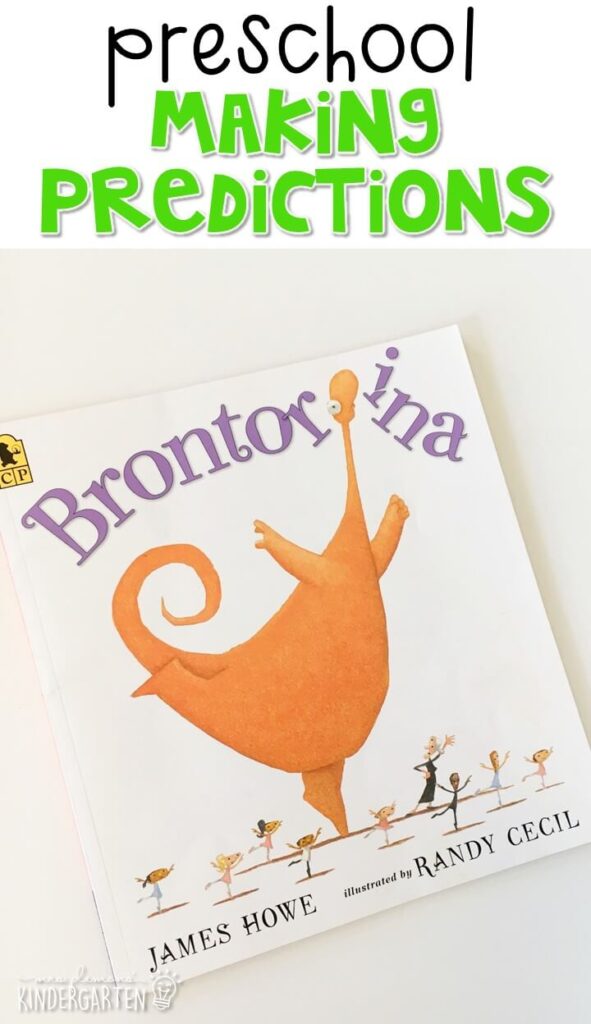
Making Predictions:
Our first story was Brontorina by James Howe. Before reading, we practiced answering questions and making predictions.
I asked “After looking at the cover, what do you think this story will be about?” Madelynn: “A dinosaur.” Then I asked: “The title is Brontorina, what do you think the dinosaur will do?” Madelynn: “Dance.”
I asked one more follow up question: “What kind of dance?”
Madelynn: “Plies.”
Obviously she was in a one word answer mood, but I love that being one on one with her allows me to ask lots of follow up questions to challenge her to think more about the books we are reading.
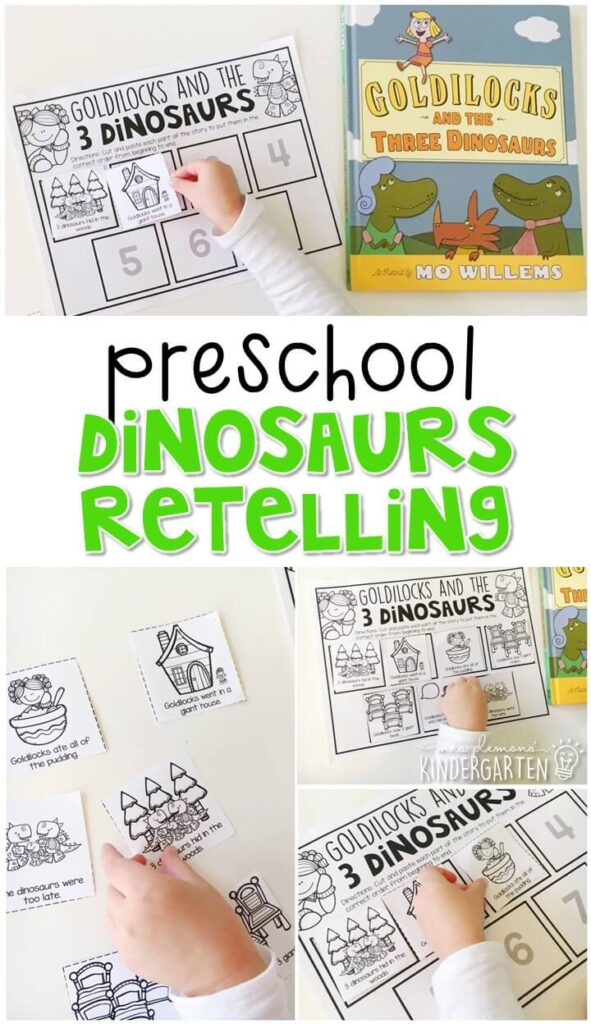
Dinosaur Retelling:
Over the past few weeks we have worked a lot on retelling the beginning middle and end of a story, so I thought it would be a good time to move on to sequencing the events in a longer story. I chose Goldilocks and the Three Dinosaurs by Mo Williems because I knew the story line would be familiar and a bit easier for her to sequence from beginning to end.
We started of course by reading the story. After reading I gave Madelynn 7 pictures from the story with simple sentences underneath. We read through them all together and then I prompted her to find what happened first, second, third, etc. She then glued them to her page in the correct order to retell the story.
Dinosaur Stomp:
After reading Stomp Dinosaur Stomp By Margaret Mayo, I printed out action cards from the story. Madelynn chose a card then had to act out each dinosaur action.
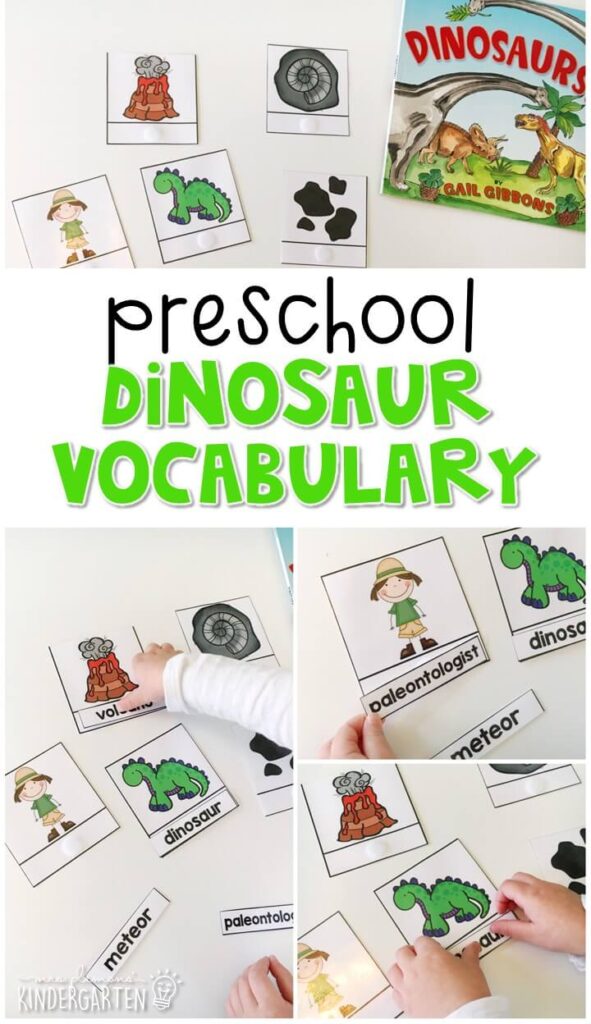
Dinosaur Vocabulary:
Next we read Dinosaurs By Gail Gibbons. After reading we used cards to match dinosaur related words to pictures. I emphasized the beginning sounds to help her choose and match the correct word to the picture.
Tracking Print:
Our last book was the letter D book from Abby’s Alphabet Book Series. Madelynn identified the picture then pointed to each word as she read. She has caught on to the pattern in these one word per page books, so she is completely independent with them at this point.
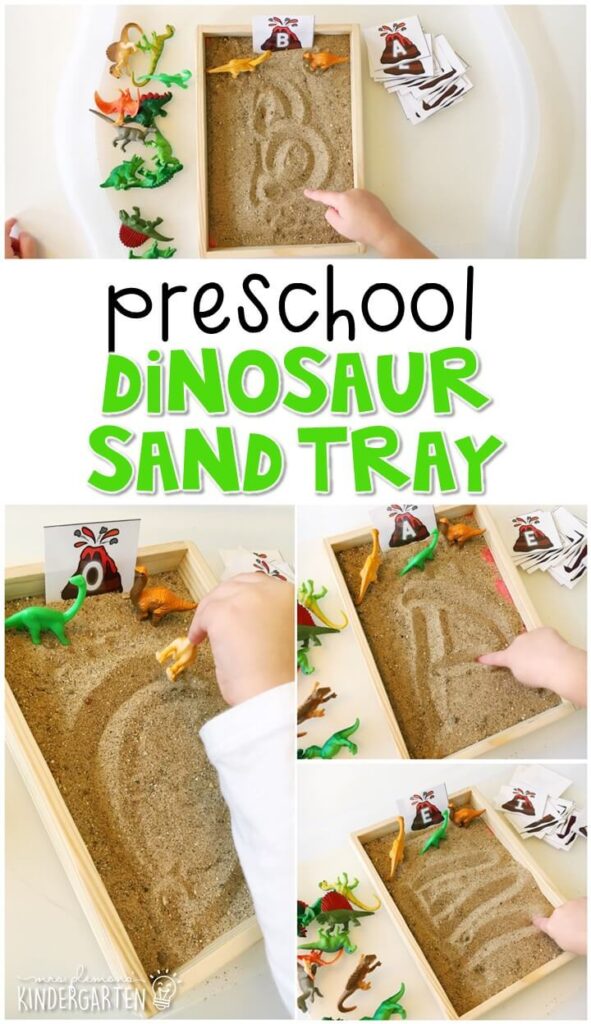
Dinosaur Sand Tray:
Our first literacy activity this week was a dinosaur themed salt tray. Madelynn used volcano letter cards as a model and chose which ones she wanted to practice. To add a bit more fun, we used dinosaur tails for writing letters too.
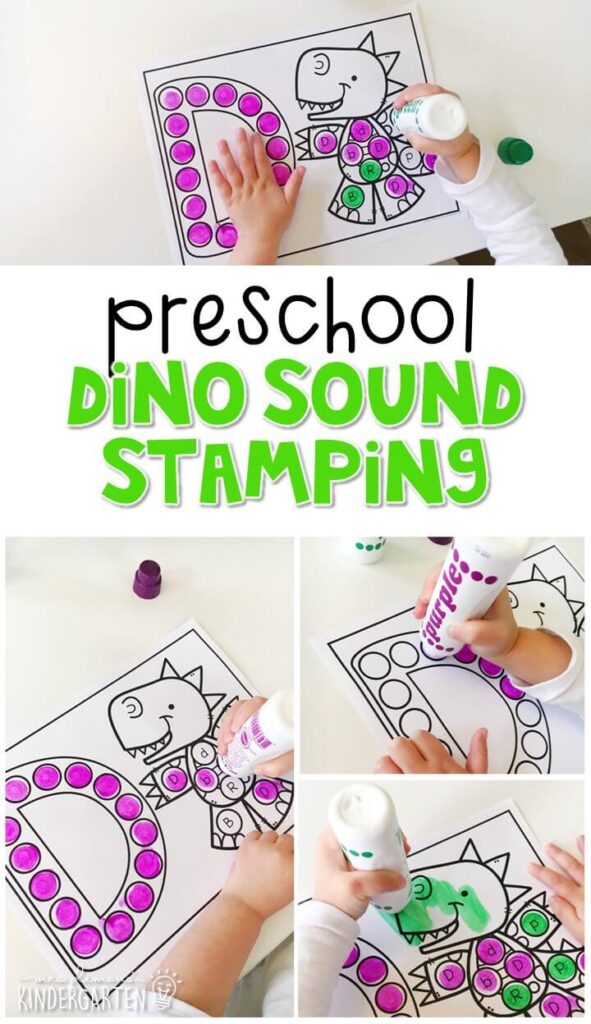
Dinosaur Sound Stamping:
Next, for more letter practice we used our dot stampers. We started out stamping inside the letter to make a D. Then Madelynn had to find the upper and lowercase d’s in the dinosaur, stamp them and make the “D” sound each time.
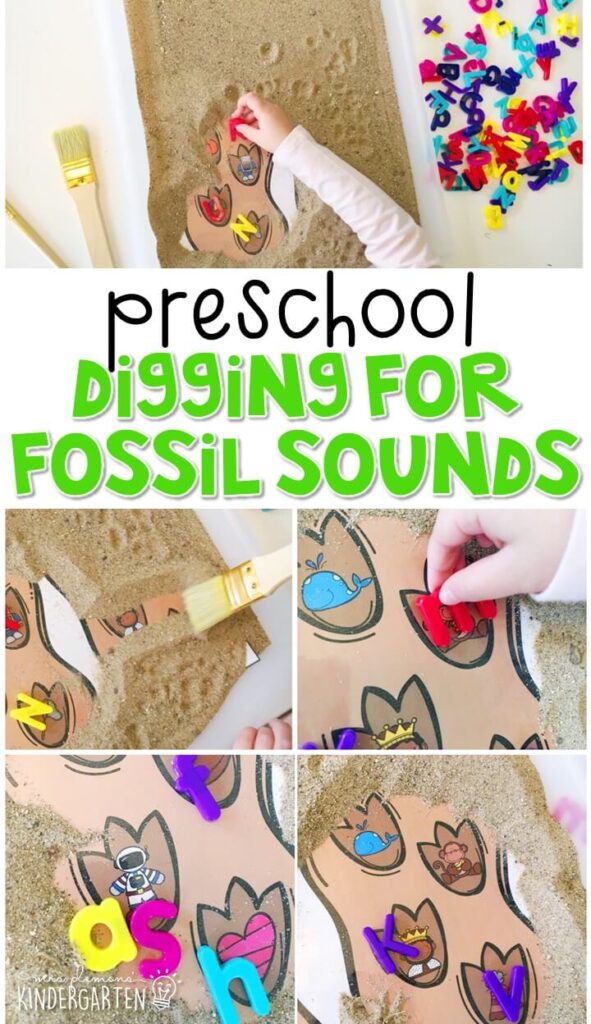
Digging for Fossil Sounds:
This month we are focusing on beginning sounds so we started with this fun fossil dig. I printed dinosaur tracks with different pictures on them, then laminated and pasted them onto our clear tray. I covered them with sand and Madelynn used paint brushes to uncover each one. After she found a picture she used a magnet letter to show the beginning sound.
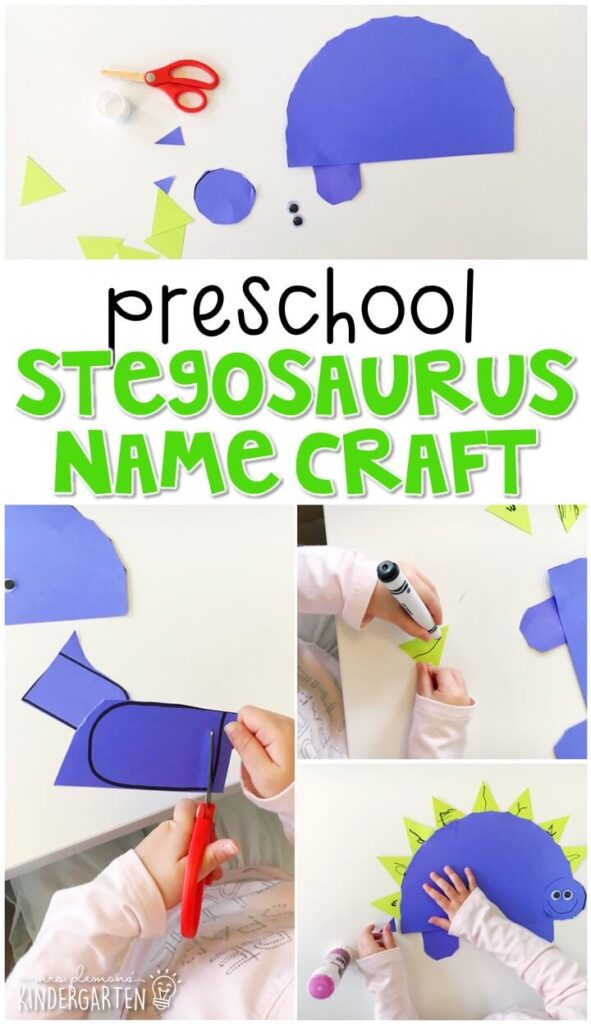
Stegosaurus Name Craft:
For this week’s name craft we created an adorable stegosaurus. First Madelynn cut the dinosaur pieces out. Then she wrote the letters in her name on each spike. After she finished writing, she glued the dinosaur pieces together and added the spikes to the back in order to spell her name. To finish off the face she added googly eyes and drew a smile.
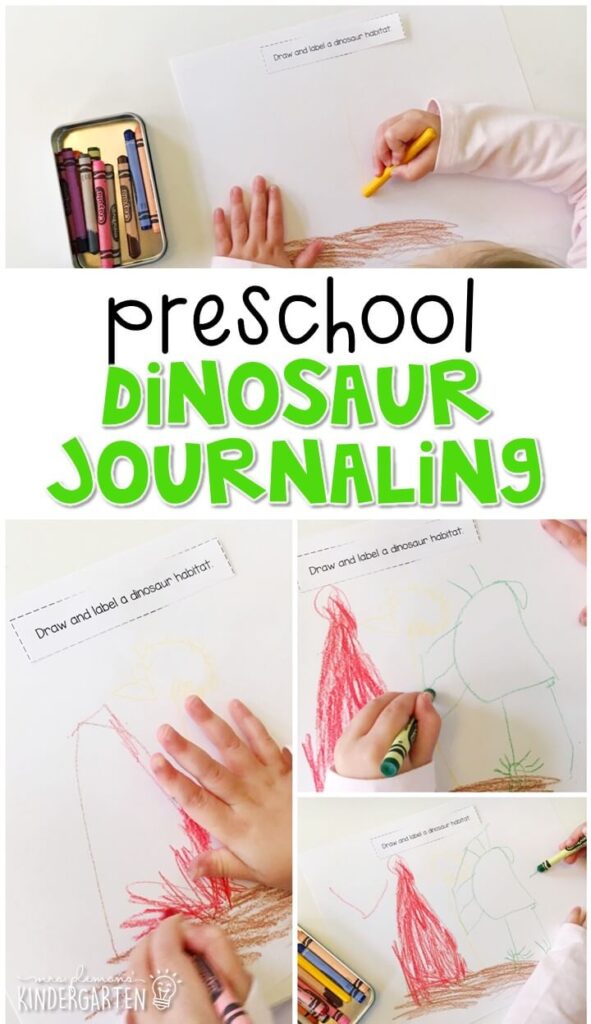
Dinosaur Journal Writing:
For our journal this week Madelynn chose to draw and label a dinosaur habitat. She drew a volcano, flower, some dirt and a dinosaur. I encouraged her to label each item so she wrote V for volcano and D for dinosaur.
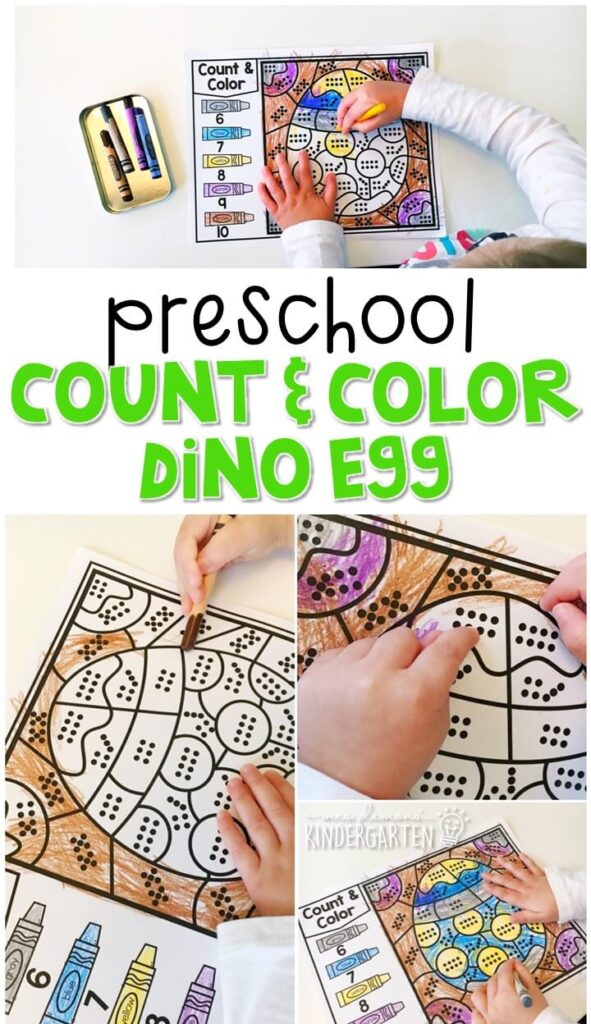
Dino Egg Count and Color:
To continue working on counting and identifying numbers, Madelynn worked on this color by code activity. Madelynn counted the dots then had to follow the directions to make each spot the correct color. Now that we’ve been doing these activities for a few weeks we moved onto 6-10 dots in each area.
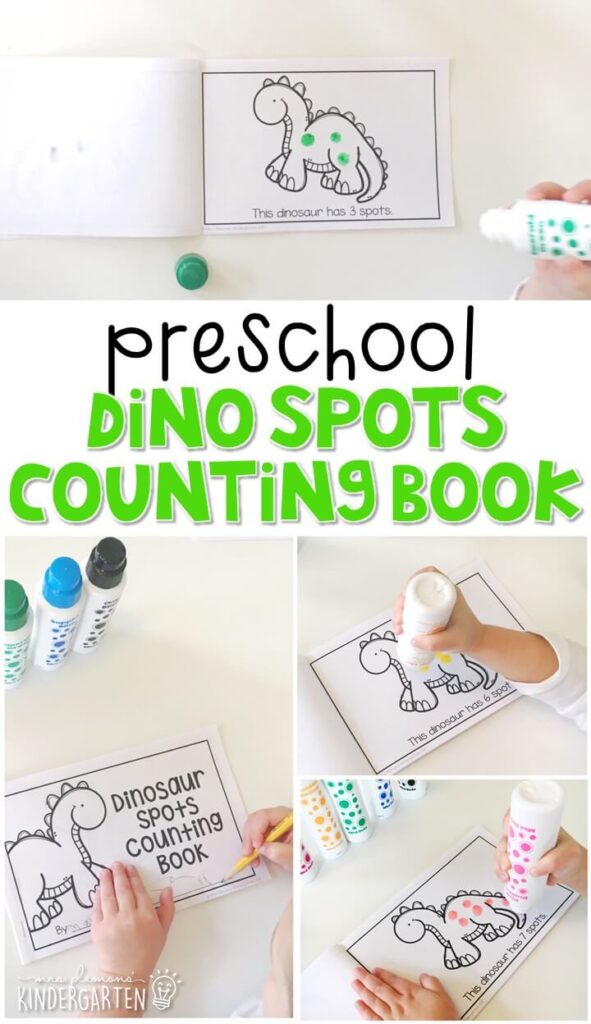
Dinosaur Spots Counting Book:
We made this little counting book together which was a perfect way to practice one to one correspondence to 10 and use emergent reading skills. Madelynn tried to read the sentence on each page. “The dinosaur has __ spots.” Then she used mini dot stampers to add the correct number of spots.
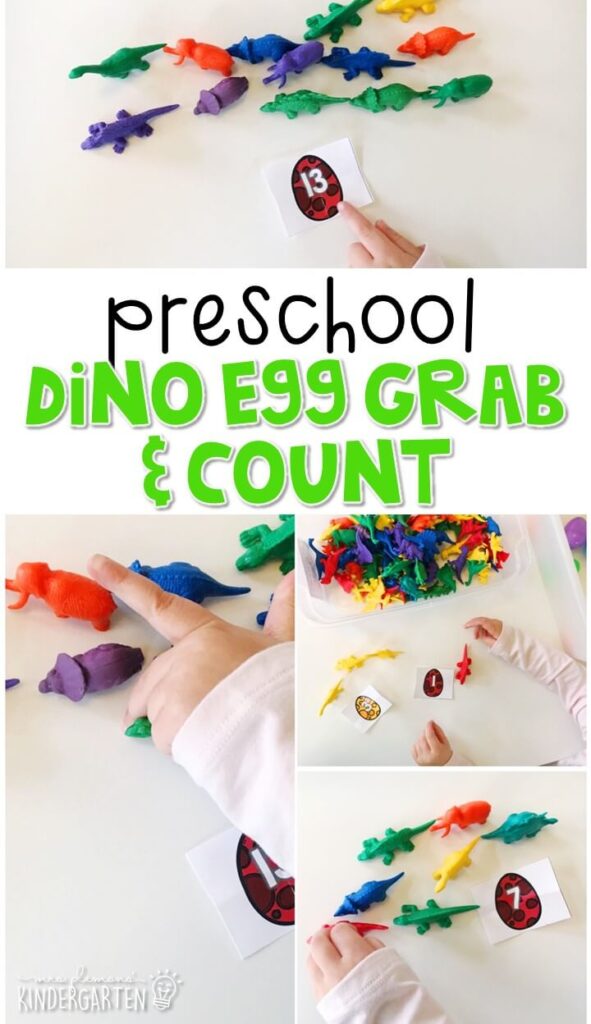
Dinosaur Egg Grab & Count:
This game was really easy to prep and fun to play. I printed numbered dino eggs, then folded them up and hid them in easter eggs. Madelynn chose an egg, identified the number, then counted out the correct number of dinosaur manipulatives.
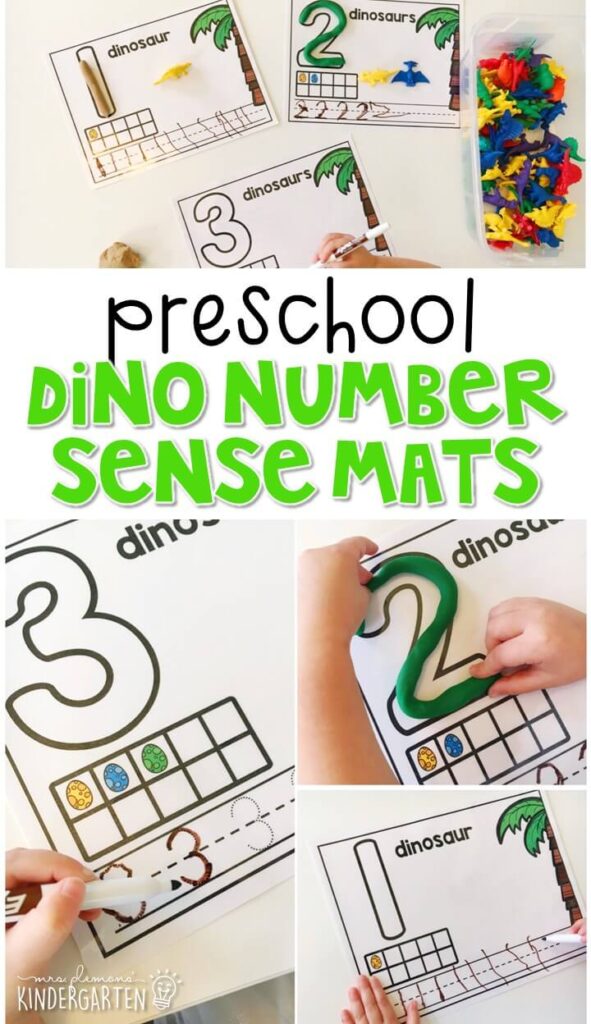
Dinosaur Number Mats:
We used these mats for LOTS of math practice this week. First, Madelynn identified the large number. Then she made it with play dough and counted the eggs in the ten frame. Next, she used a dry erase marker to practice writing the number, and finally counted out dinosaur manipulatives to make the correct amount.
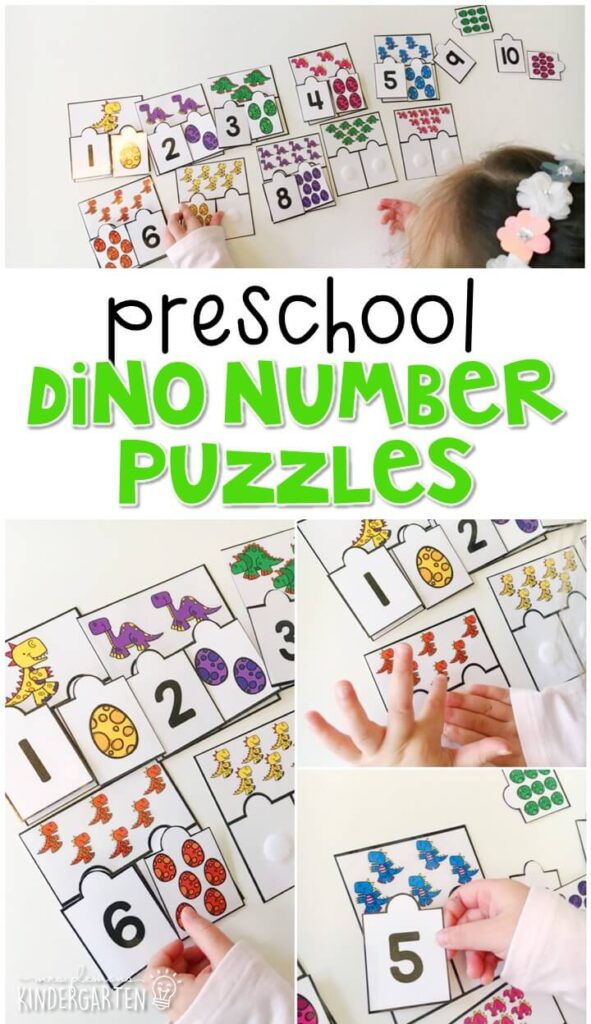
Dinosaur Number Puzzles:
I love making puzzles for Madelynn to practice different concepts but sometimes she gets frustrated that the pieces don’t really snap together like real puzzles. So for these dinosaur number puzzles I printed the entire 3 piece puzzle outline with a different number of dinosaurs at the top of each one. Next I printed the bottom pieces and cut them apart. Then, I added Velcro dots to the bottom so that when she matched them to the correct spot she didn’t have to worry about them moving around.
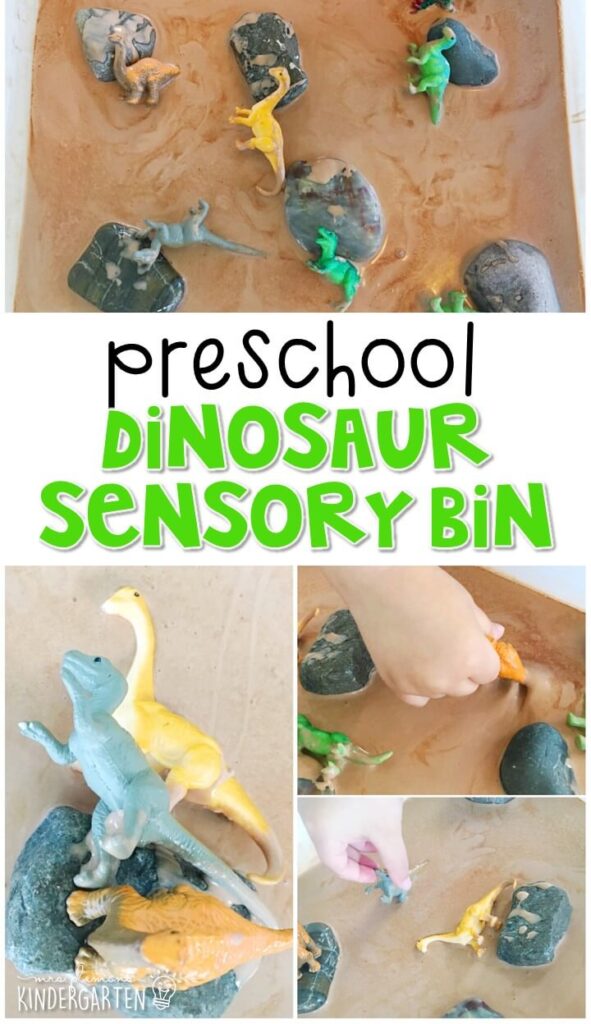
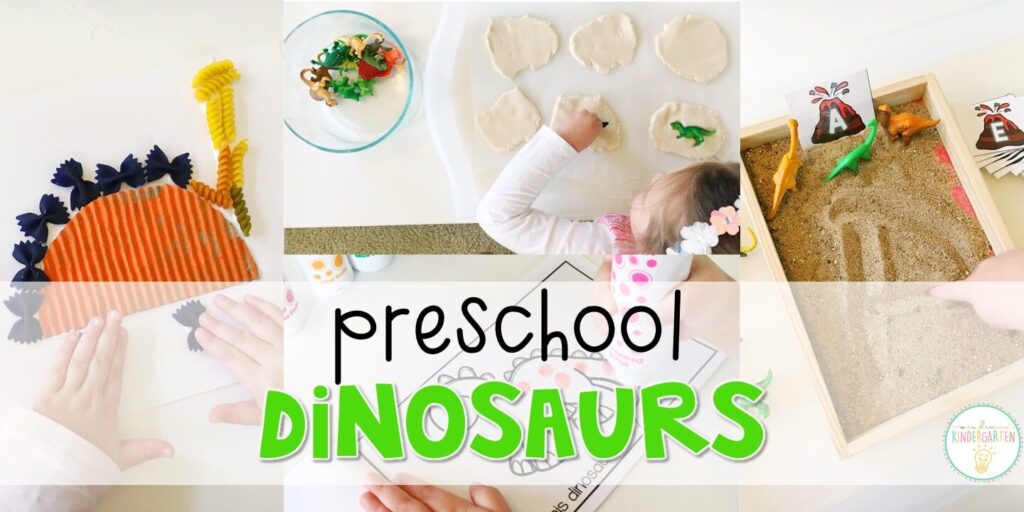
Dinosaur Cloud Dough Sensory Bin:
In this bin: cloud dough (8 cups flour & 1 cup vegetable oil mixed together), plastic trees, TOOB dinosaurs, and rocks.
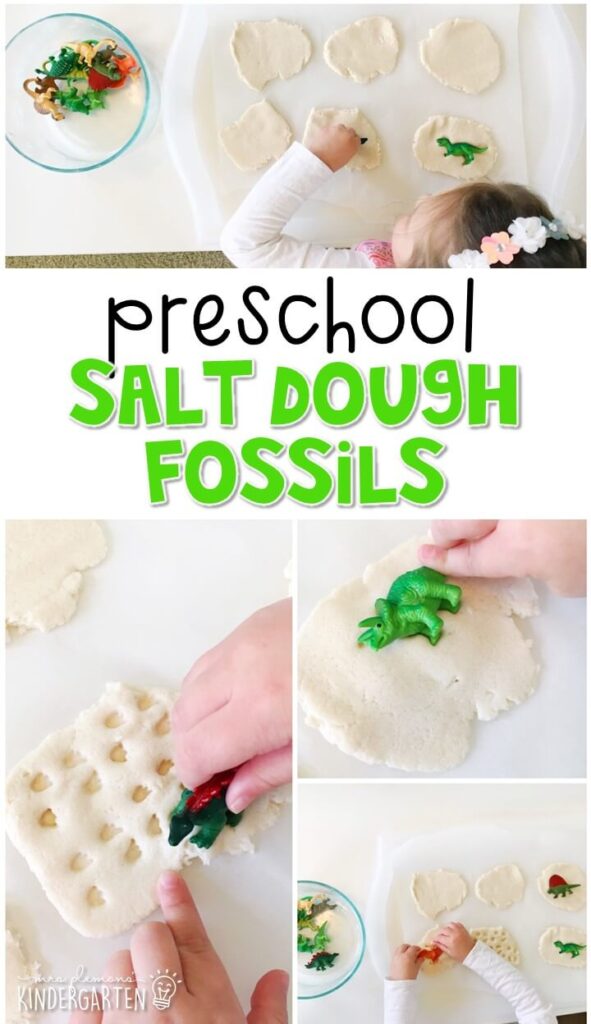
Salt Dough Fossils:
Salt dough is one of the only homemade play dough recipes I actually make because it’s super fast, easy and I always have the ingredients on hand. To make our salt dough I combine 4 cups flour and 1 cup salt in a bowl. Then I slowly add 1 1/2 cups of water. I start by mixing in a bowl with a spoon, then begin to hand knead the dough as it begins to form.
After the dough is ready I rolled small pieces out for Madelynn to use for fossil printing. She chose to make some side prints, and some dinosaur tracks as well. After she was finished we baked them in the oven at 325 degrees for about an hour until they were completely hard and dry throughout. (You may need to adjust the time depending on the thickness of your dough). After they cooled we made fossil rubbings by laying paper on top of each fossil and rubbing a crayon back and forth across the page.
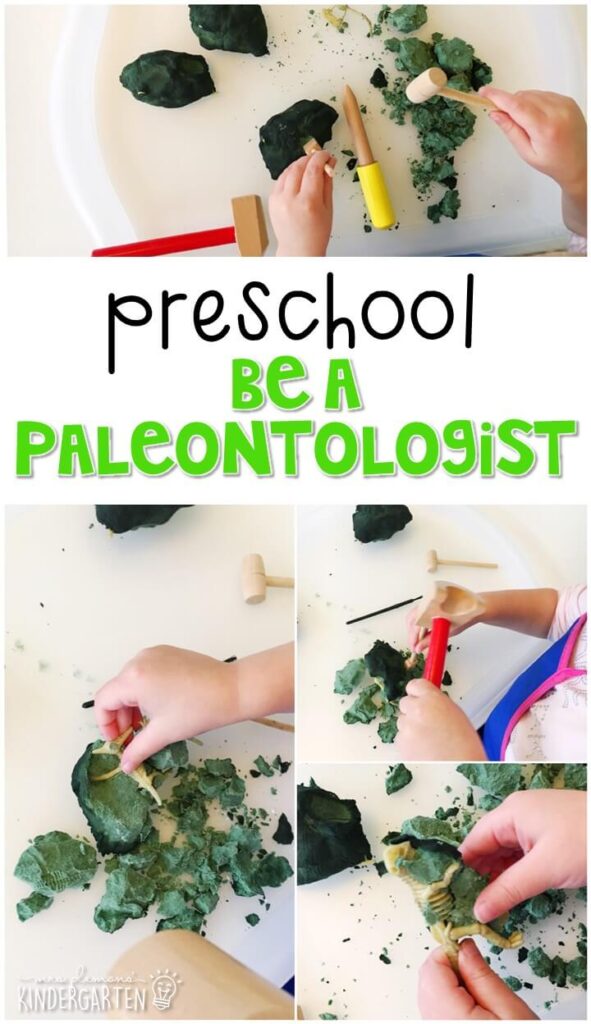
Be a Paleontologist:
I knew I wanted to find a way for Madelynn to play and learn about being a paleontologist for this theme. However, I bought a dino dig kit from the target dollar section before and it was so hard for Madelynn to chip away at, that I basically ended up having to break apart the entire thing for her since she was getting so frustrated. I mean it was even pretty hard for me to break up, so I’m not sure who those things are really made for.
I decided I would make my own softer version of these dino eggs by making a baking soda version. I poured a few cups of baking soda in a large bowl, then added water very slowly so that the baking soda was JUST wet enough to mold without getting mushy. (The drier you can keep it the better, because it will dry out faster later) I added a few drops of food coloring to the mix before adding the dinosaurs.
Next, I molded a small amount in my hand then pressed a dino skeleton into it and added more baking soda on top. I formed it into an egg shape then set it on a tray to dry. I made a bunch of them then let them dry overnight. Madelynn used a hammer and screwdriver as a chisel to break up each egg and it was SOOO much easier than the store bought version.
You could also add in a few eye droppers with vinegar for more fun. Since the eggs are made of baking soda they will fizz and bubble as they break apart.
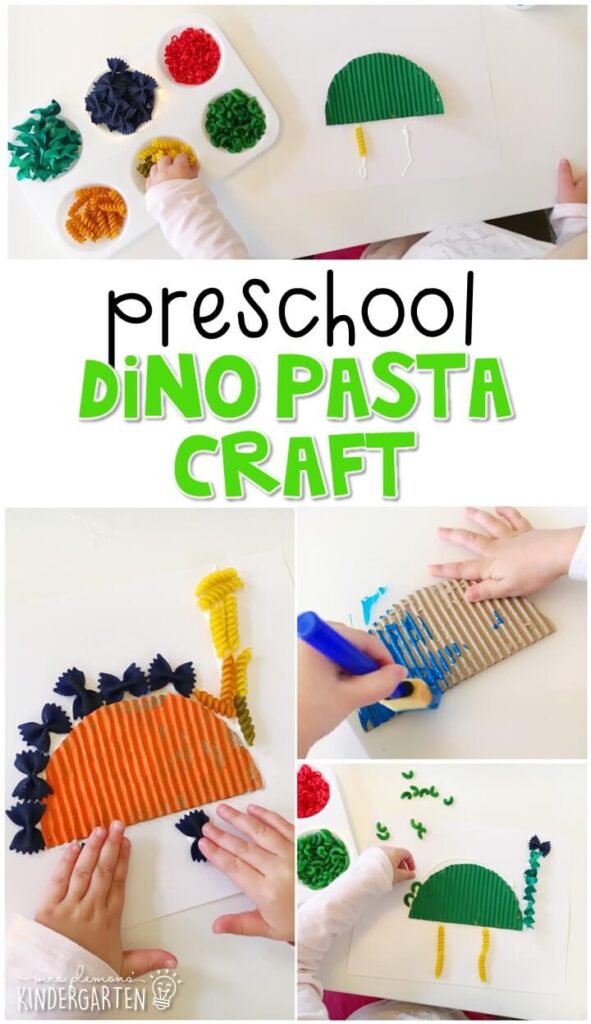
Dinosaur Pasta Craft:
For this craft we made a bit of a mixed media collage. First, Madelynn painted cardboard semi circles with tempera paint for dinosaur bodies. We let those dry for a bit, then she glued each one onto a piece of cardstock. Then, Madelynn used colored pasta shapes to create long necks, tails, legs, spikes, and more.
Dinosaur Mud Sensory Bin:
In this bin: chocolate “oobleck,” rocks, TOOB dinosaurs, and rocks.
To make the oobleck mud: Start with 1 cup water in a bowl. Add 2 cups cornstarch a bit at a time and sprinkle a few spoonfuls of unsweetened cocoa powder in as well for color and scent. Stir with a spoon (or I find it’s actually easier to use your hands for this one) until you reach a gooey consistency. Add dinosaurs and rocks to explore!
Want all of this week’s Dinosaurs activities for preschool? You can grab them here:
On my site : Dinosaurs Plans & Printables On TpT: Dinosaurs Plans & Printables
Or you can grab our entire year of themes and plans:
On my site here: Preschool Bundle On TpT here: Preschool Bundle
Then check out the rest of our 45+ themes on the Preschool Curriculum Main Page.


I love your digging for fossil sounds idea! I think my kindergarteners will, too. Thanks for sharing so many great dino ideas! Dinos are always a favorite in my classroom.
Love your ideas!
Hi Jessica, can the spot counting booking be purchased on its own?
I’m sorry I do not sell the activities individually at this time.