
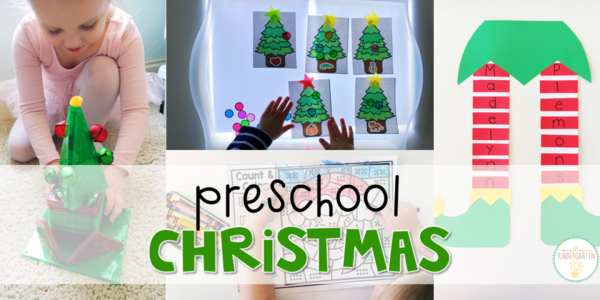
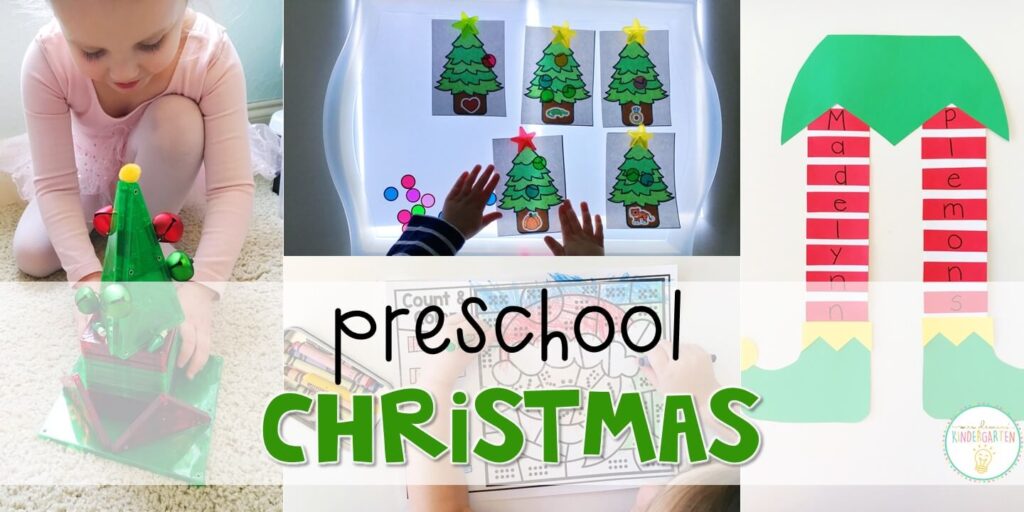
It’s finally time for my favorite theme of the year…CHRISTMAS! Baking cookies, decorating trees, making gingerbread houses, shopping for friends and family, there’s so much to do this time of year! But I love that we are able to slow down and spend a little bit of time each day learning together. So grab a cup of hot cocoa and check out 2 weeks worth of Christmas themed learning ideas to try out with your littles.
**This post contains affiliate links for your convenience. View our full disclosure policy here.**
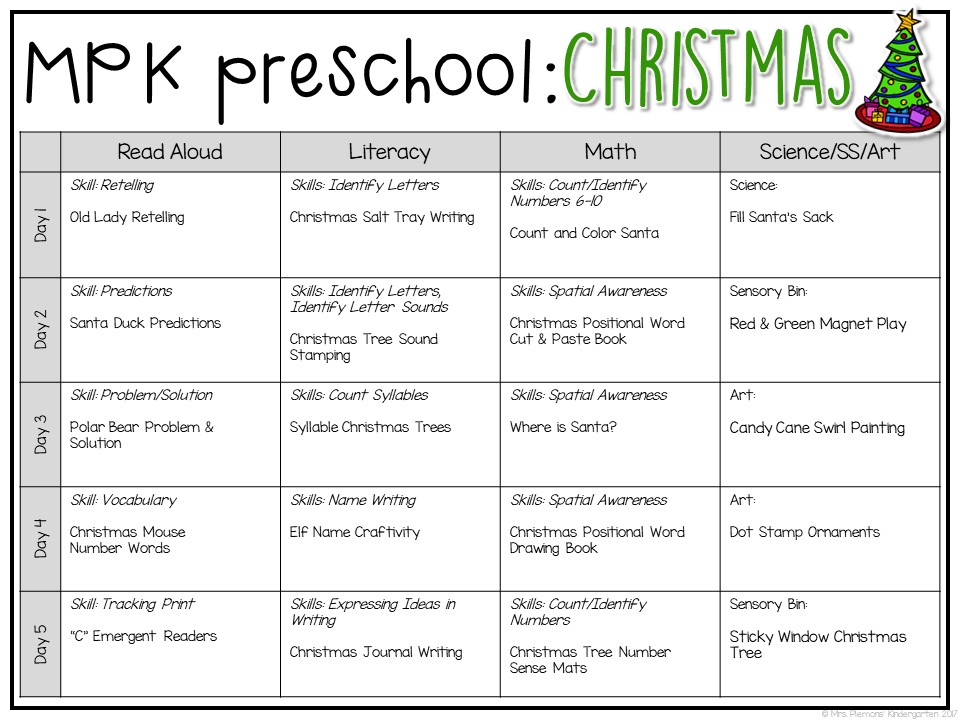
Here were our plans for Christmas week 1:
And here are the details for each activity:
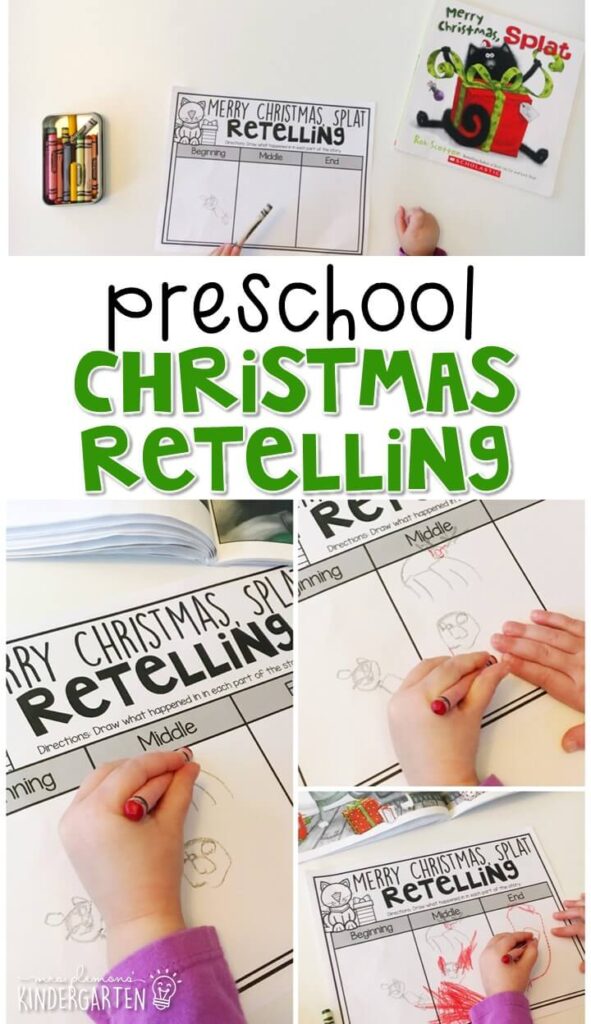
There Was an Old Lady Who Swallowed a Bell Retelling:
Our first read aloud was There Was an Old Lady Who Swallowed a Bell by Lucille Colandro. After reading, I taped a picture of the little old lady to a wipe container then gave Madelynn pieces from the story. She fed them to the little old lady while retelling the story in order.
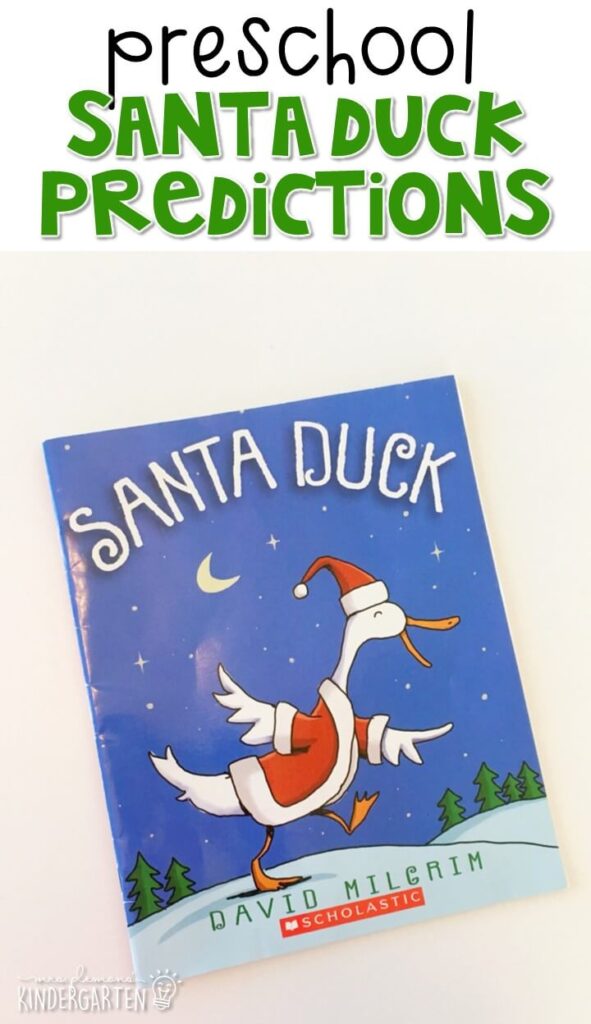
Santa Duck Predictions:
Our next story was Santa Duck by David Milgrim. Before reading, we practiced making predictions.
I asked “After looking at the cover, what do you think this story will be about?” Madelynn: “The duck is going to deliver the presents.” Then I asked: “What makes you say that?” Madelynn: “Because he is dressed like Santa, so maybe Santa is sick.”
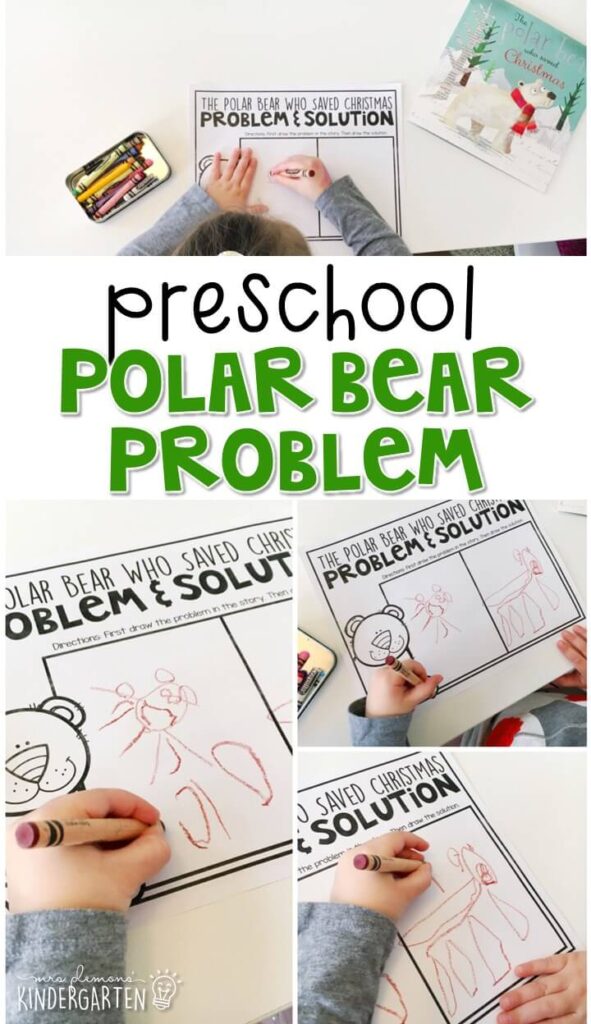
Polar Bear Problem & Solution:
Our next story was The Polar Bear Who Saved Christmas by Fiona Boon. Before reading we discussed and defined problem. We talked about how every story usually has a problem or something that goes wrong. After reading, Madelynn drew and labeled the problem in the story (Dasher had a broken leg.) Then we talked about and drew how the problem was solved (The polar bear helped fly the sleigh.)
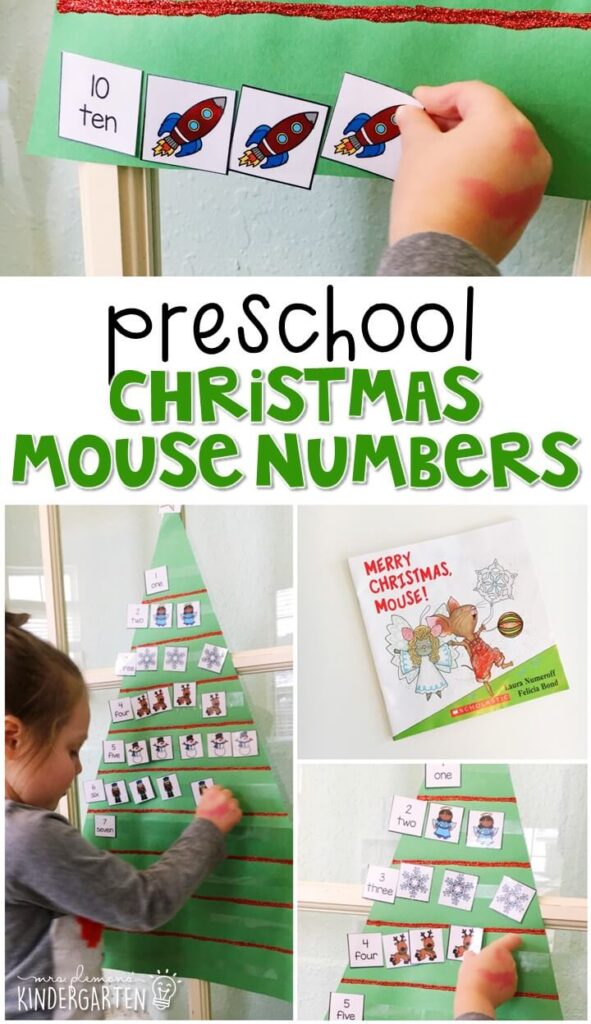
Merry Christmas, Mouse! Numbers:
Next we read the counting book, Merry Christmas Mouse! by Laura Numeroff. To practice counting and number words, I printed number and ornament cards from the story and cut out a large tree from construction paper. Madelynn stuck the numbers and ornaments onto a large tree in order to retell the story and practice counting.
Tracking Print:
Our last book was this letter C alphabet reader. Madelynn identified the picture then pointed to each word as she read. Afterwards she colored all of the pictures in.
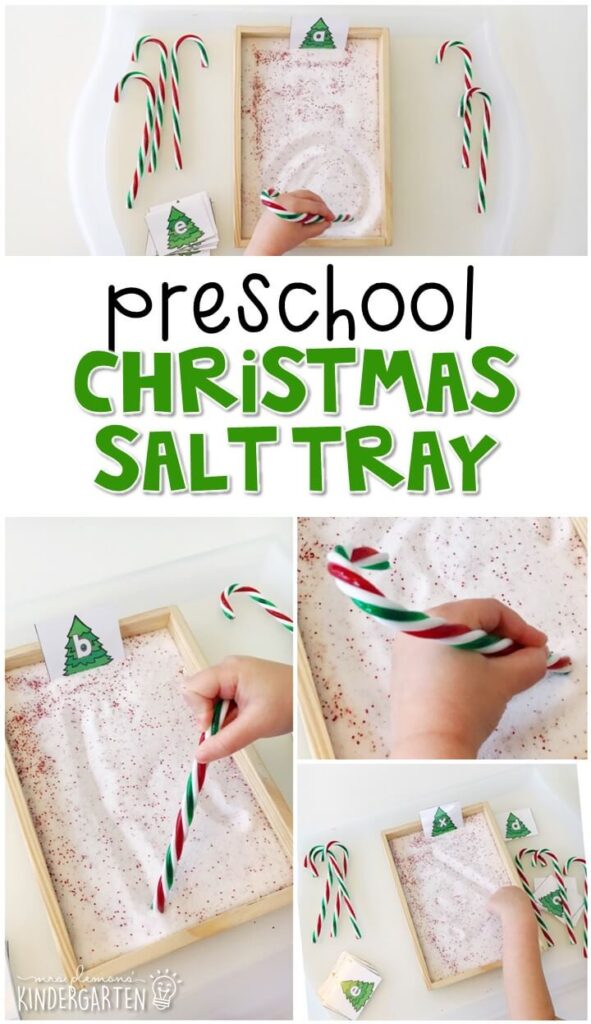
Christmas Salt Tray:
Our first literacy activity this week was a Christmas themed salt tray. To make this fun Christmas salt I mixed 1/2 cup salt with 1 tsp of red glitter. Madelynn used Christmas tree letter cards as a model and chose which ones she wanted to practice. To add a bit more fun, we used plastic candy canes for writing letters too.

Christmas Sound Stamping:
Next, for more letter practice we used our dot stampers. We started out stamping inside the letter to make a C. Then Madelynn had to find the upper and lowercase c’s in the Christmas tree, stamp them and make the “C” sound each time. We also talked about how C makes 2 sounds. Soft C says /s/ like “circle” and hard C says /c/ like “Christmas.”
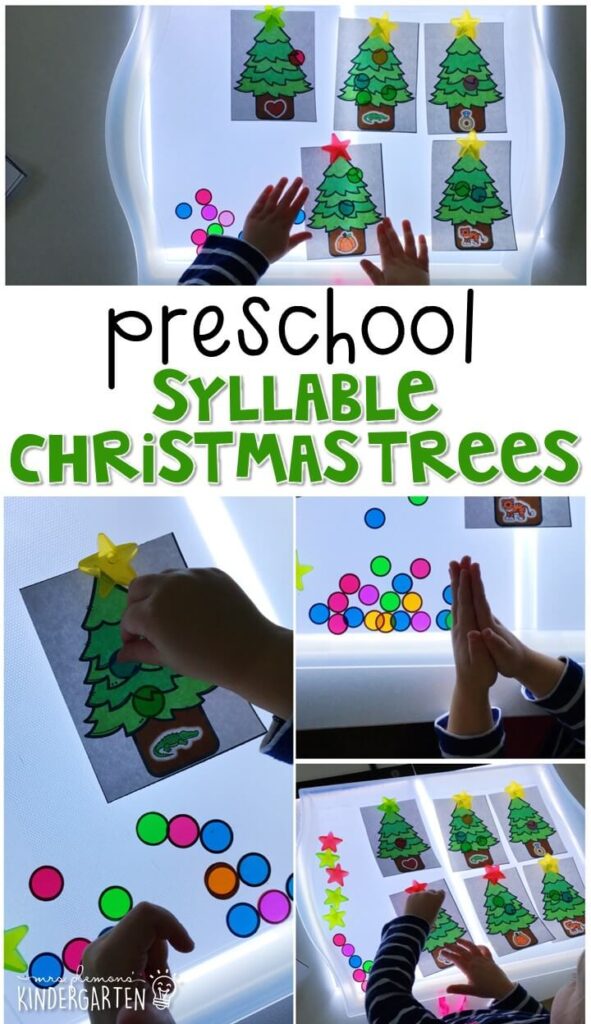
Syllable Christmas Trees:
Madelynn is loving our light pad lately, something about it’s glow just always gets her engaged right away. I placed our clear tray on top of 2 light pads (You could use just one, but I grabbed an extra one since they are pretty cheap. We like the extra glow, and 2 fit perfectly under our large tray.) Then I printed Christmas trees with pictures on the stumps. Madelynn chose a tree, and clapped the syllables in the picture on the stump. I showed her how to count the syllables by putting up one finger for each clap, and she added that many colored bingo chip ornaments to the tree.
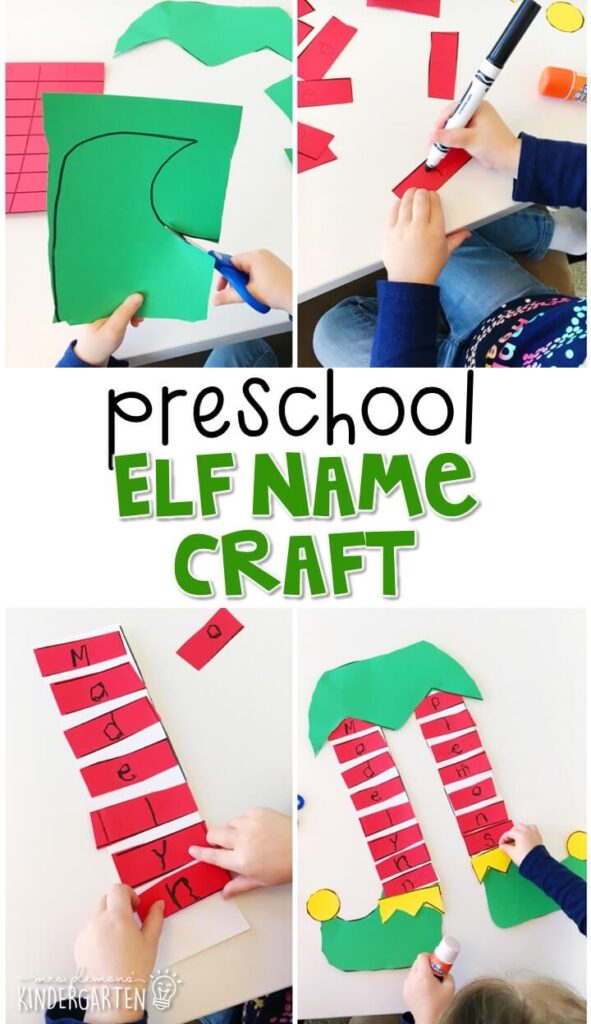
Elf Name Craft:
For this week’s name craft we created this adorable elf. First Madelynn cut the elf pieces out. Then she traced the letters in her name on each stripe. We chose to do first and last name this week, but you could do just first name on one leg and plain stripes on the other. After she finished writing, she glued the elf pieces together and added the stripes to the legs in order to spell her name.
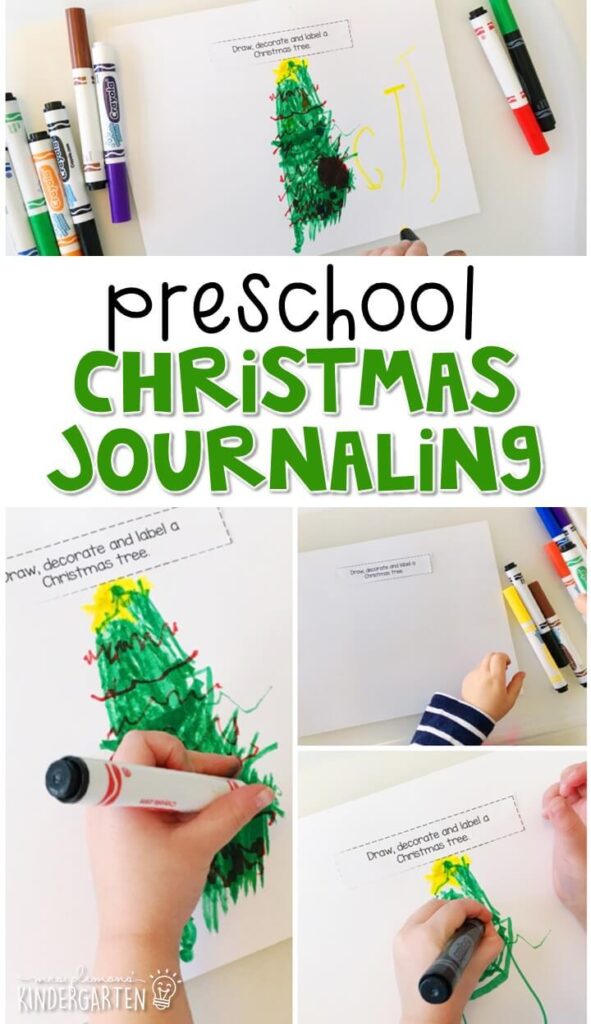
Christmas Journal Writing:
For our journal this week Madelynn chose to draw, decorate, and label a Christmas tree. After working hard on all the details, I encouraged her to label her picture. She wrote C for Christmas (which really impressed me since usually she only uses K for the /k/ sound) and TT for tree.
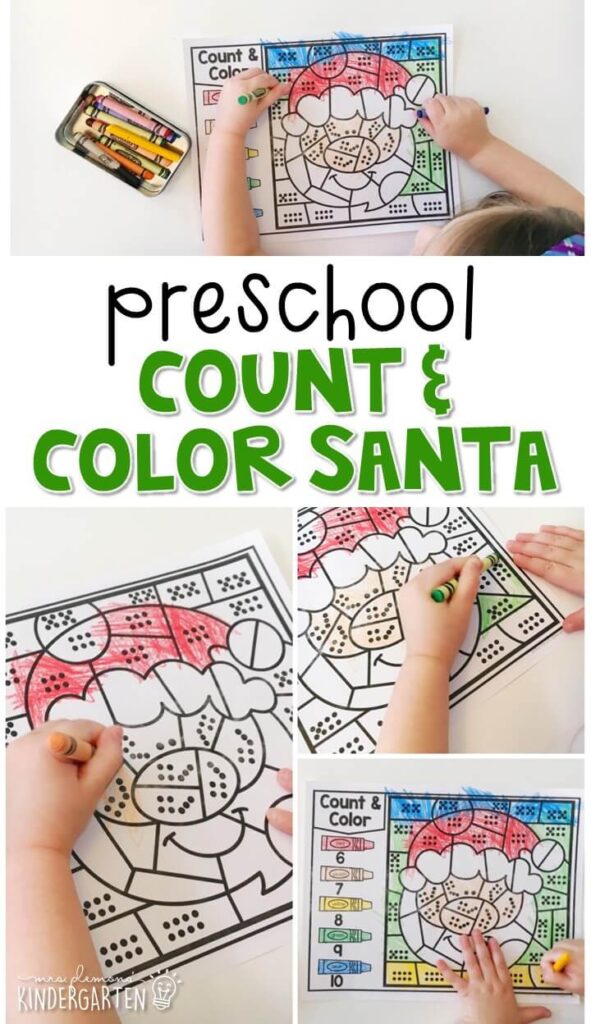
Santa Count and Color:
To continue working on counting and identifying numbers, Madelynn worked on this color by code activity. Madelynn counted the dots then had to follow the directions to make each spot the correct color. She is getting pretty fast at counting the groups of 6-10 dots so we will have to switch up our math skill soon!

Christmas Positional Word Cut and Paste Book:
This week we focused on positional words in math. For our first activity, I created this simple printable book with cut out pieces. On each page I used a different positional word (above, below, behind, next to, between, etc.) and Madelynn cut and glued the Christmas themed items in the correct spot on each page.
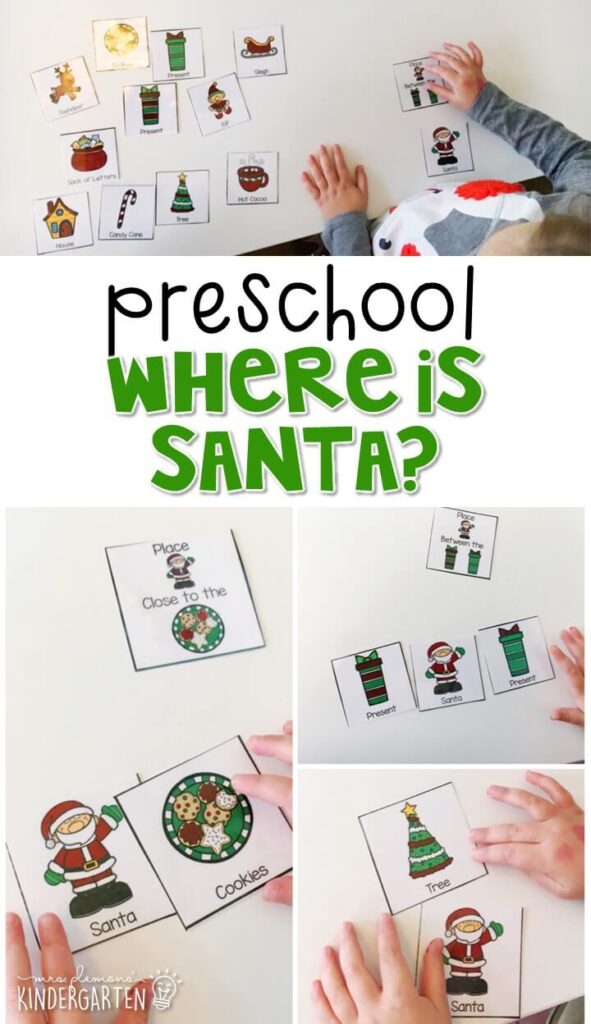
Where is Santa?
For this positional word game I made printable Christmas items and positional word direction cards. (We also plan to use these cards again with the pieces from our Little People Advent Calendar but we haven’t opened all the doors yet 😉 Madelynn chose a card then put Santa in the correct position, easy peasy.
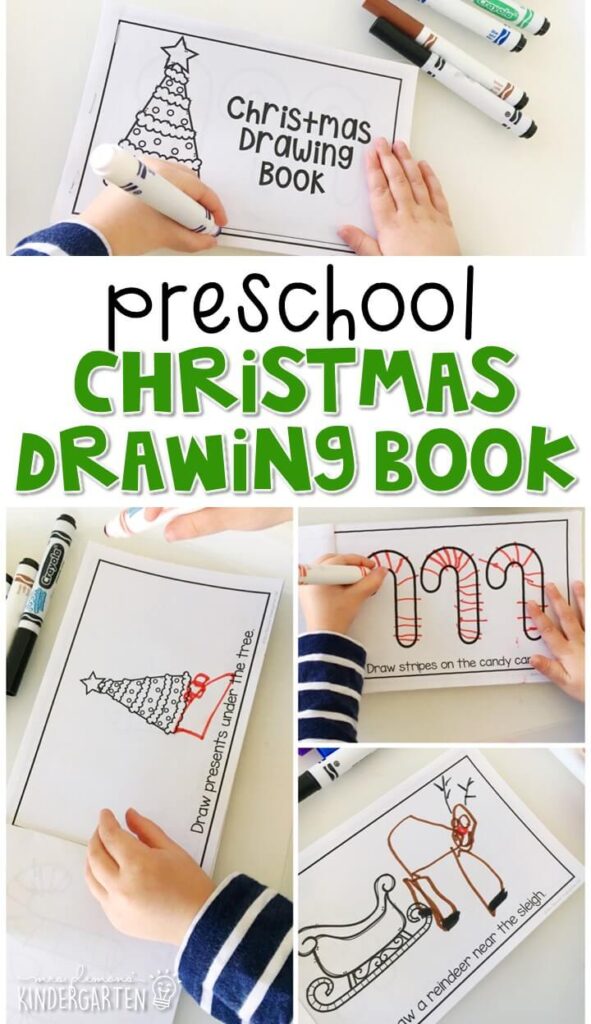
Christmas Positional Word Drawing Book:
This book is very similar to our cut & paste book, except Madelynn had to draw the missing parts instead of gluing them. On each page Madelynn followed the directions to practice positional words and complete the Christmas themed picture. (Ex: Draw stripes ON the candy canes, draw a reindeer NEAR the sleigh.)
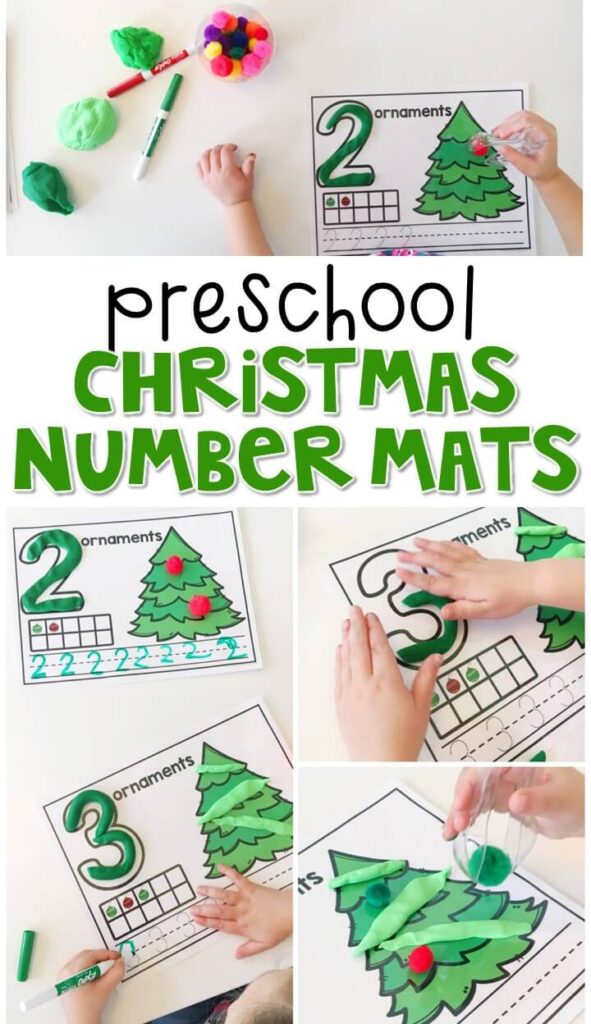
Christmas Number Mats:
We used these mats for LOTS of math practice this week. First, Madelynn identified the large number. Then she made it with play dough and counted the ornaments in the ten frame. Next, she used a dry erase marker to practice writing the number, and finally counted out red and green pom poms to make the correct amount.
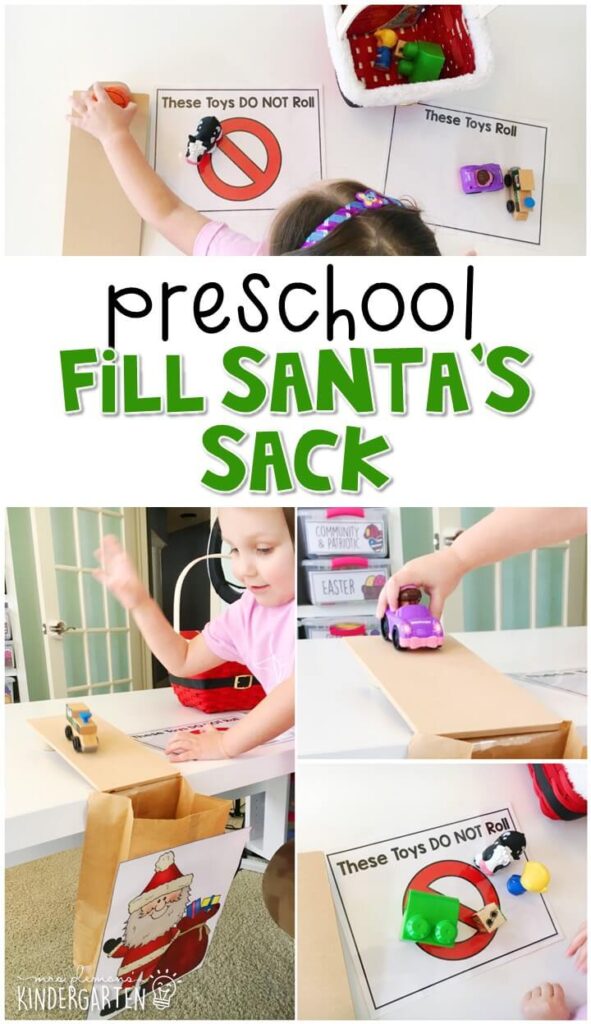
Fill Santa’s Sack:
For some science fun I set up this force and motion activity for Madelynn to experiment with. It was really easy to set up. I taped Santa to a paper lunch bag, set up a small ramp with a flat board and a small container, then taped the bag to the edge of the table so the ramp would empty into it. Madelynn gathered a bunch of small toys then tested to see which toys rolled and which toys did not. Finally she sorted them onto the mats.
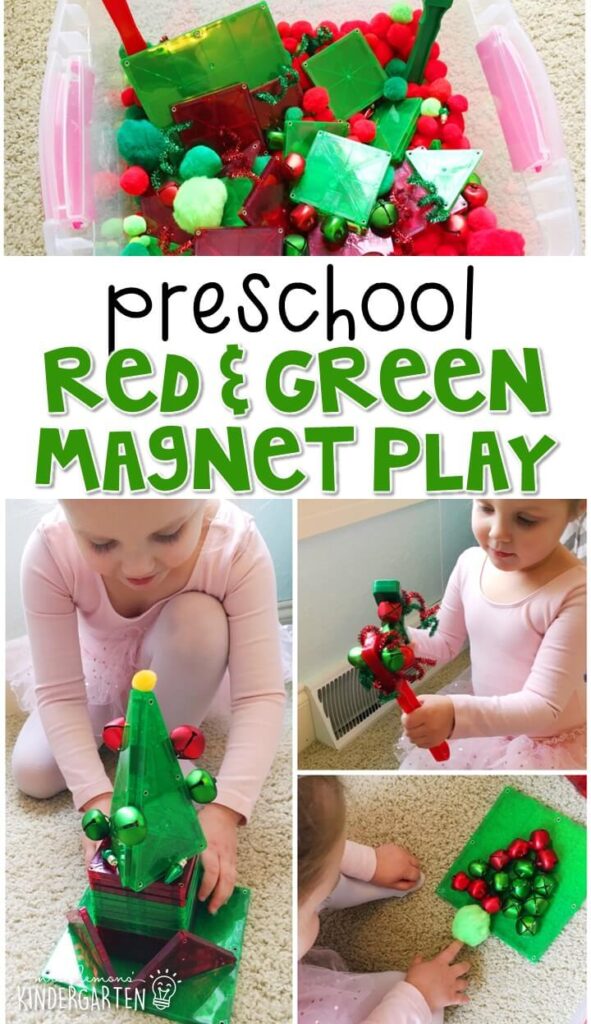
Red & Green Magnet Play:
In this bin: jingle bells, Magnatiles, magnet wands, mini ornaments, pipe cleaners, pom poms
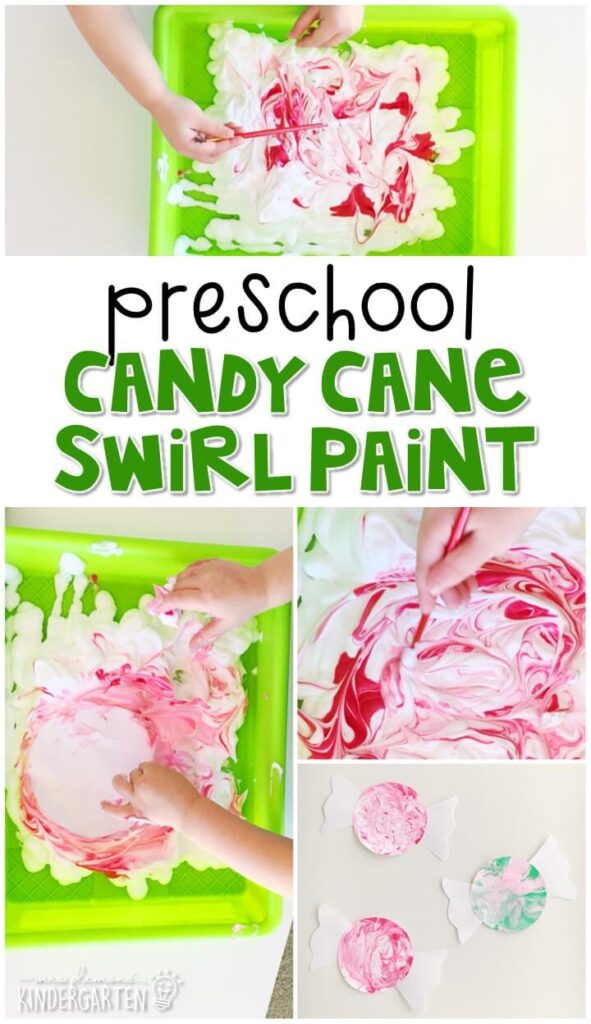
Candy Cane Swirl Painting:
These paintings were super easy to do. First, I filled a shallow tray (thanks Target dollar spot!) with shaving cream. Then I added a few dots of red/green watercolor paint. Madelynn used a paintbrush to swirl the colors around. Then she gently placed a white cardstock circle on top and patted very lightly. She pulled it off of the shaving cream, then I helped her use a craft stick to push all of the excess cream off and reveal a swirled design. We made a bunch then allowed them to dry. After they dried we glued 2 wrapper pieces to the sides.
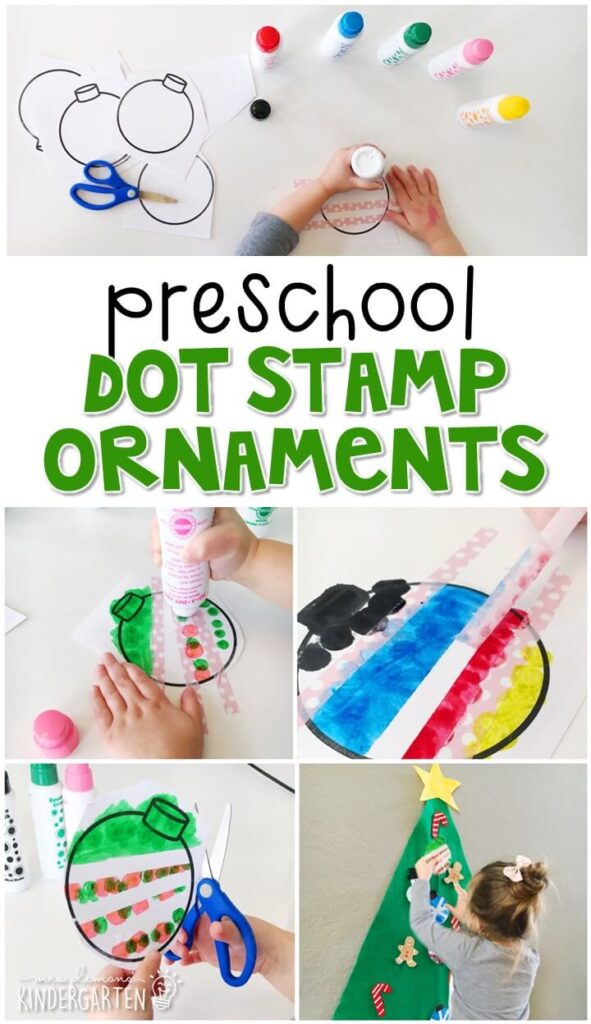
Dot Stamp Ornaments:
Madelynn still loves the little felt tree that I made for her when she was a baby, so I figured it was time to add a few new decorations. I printed ornament outlines on cardstock. She covered the outline with a few strips of washi tape then used dot markers to stamp and color the remaining spaces. After peeling the tape, she cut the ornament out and I laminated it (to protect it from sassy little sisters). We added a Velcro dot t each one and stuck them on our felt tree.

Sticky Window Christmas Tree:
Our last activity of the week was Madelynn and baby sister Aubrey approved! I drew a large Christmas tree on the non-sticky side of a sheet of contact paper and stuck color ornaments to the tree so the color side will show through the paper when it is taped sticky side out. After taping it to the window, Madelyn went to town matching mini pom poms to the ornaments and sticking them to the paper. To complete the tree she added green paper shreds to fill in some texture.
That’s it for this week, but there is more Christmas fun to come in Christmas week 2!
Want all of this week’s Christmas activities for tot school? You can grab them here:
On my site : Christmas Plans & Printables On TpT: Christmas Plans & Printables
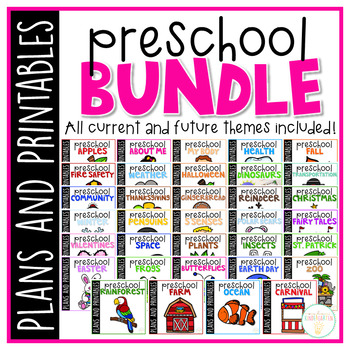
Or you can grab our entire year of themes and plans:
On my site here: Preschool Bundle On TpT here: Preschool Bundle
Then check out the rest of our 45+ themes on the Preschool Curriculum Main Page.


Leave Your Comments