
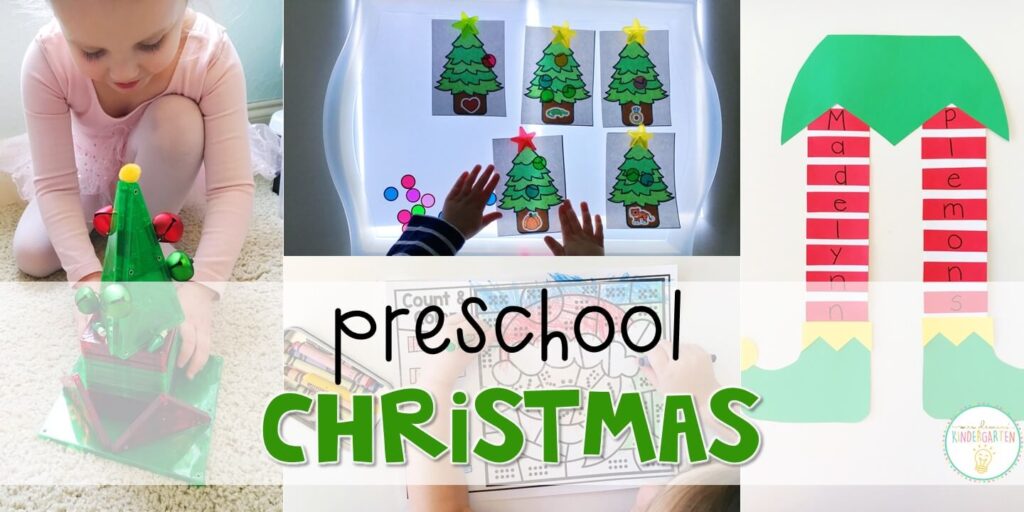
The past two weeks have been overloaded with holiday fun! Something about a Christmas theme just makes learning so magical. I hope you have as much fun as we did with all of these holiday themed learning ideas!
**This post contains affiliate links for your convenience. View our full disclosure policy here.**
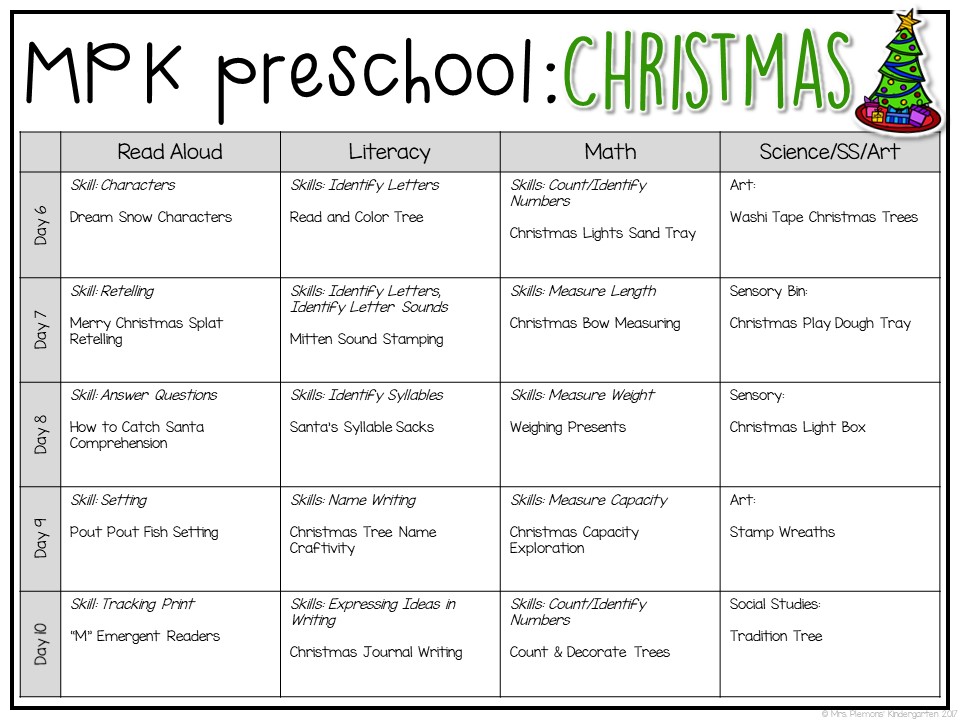
Here were our plans for Christmas week 2:
And here are the details for each activity:
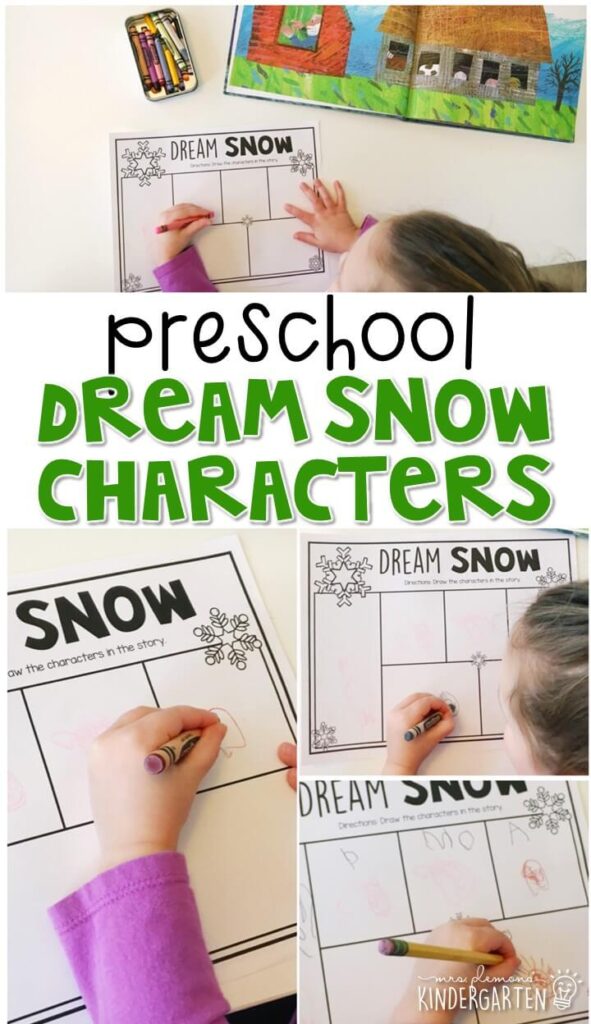
Dream Snow Characters:
Our first story this week was a simple Christmas favorite of mine, Dream Snow by Eric Carle. After reading Madelynn drew and labeled the characters in the story.
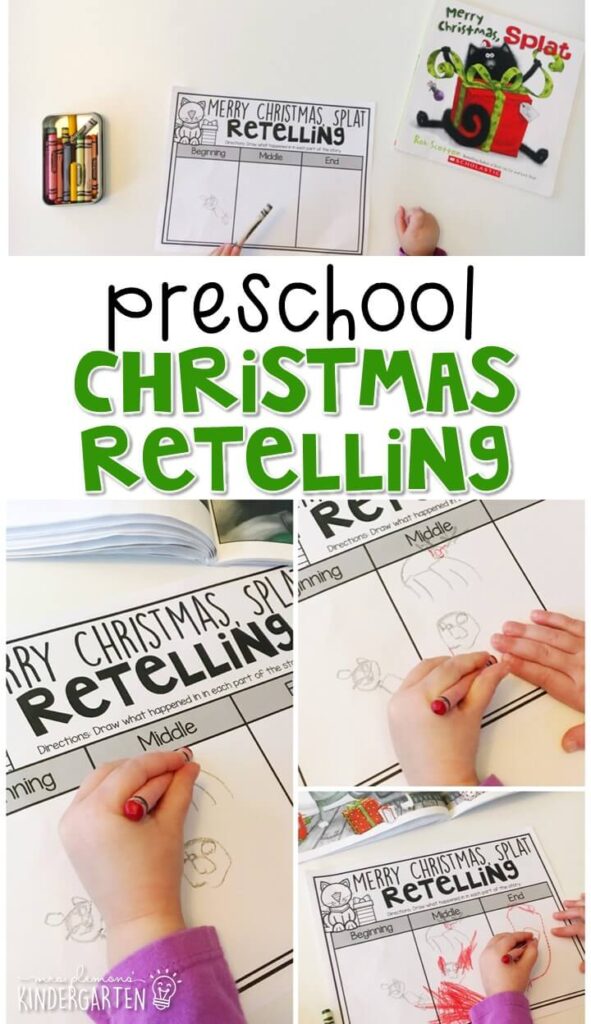
Christmas Retelling:
We love all of the Splat books, so our next story was Merry Christmas Splat by Rob Scotton. After reading Madelynn drew pictures to show what happened in the beginning, middle and end of the story.
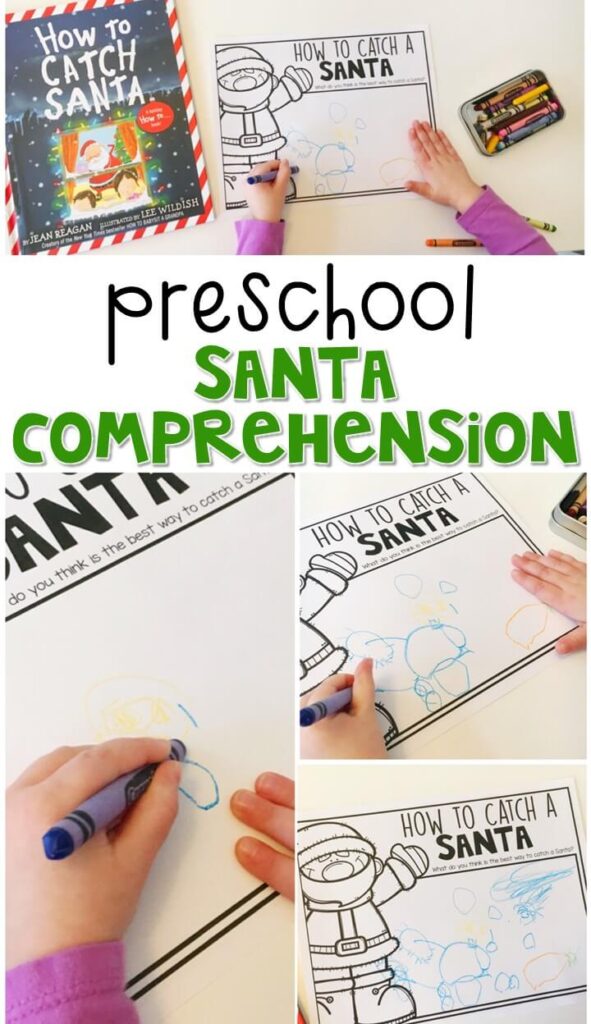
Santa Comprehension:
Next, we read How to Catch Santa by Jean Reagan. After reading, we talked about all of the ways the kids tried to catch Santa. Then I asked Madelynn if she thought they would work or not. Finally she drew to show what she thought would be the best way to catch Santa. Madelynn said she would lasso Santa, and leave carrots for the reindeer.
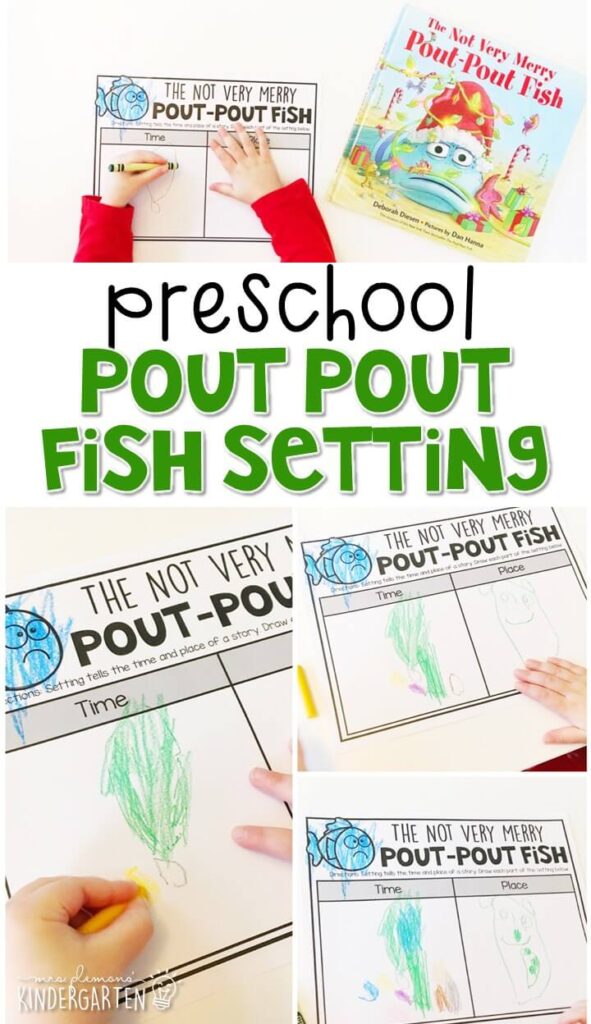
Pout Pout Fish Setting:
Our last Christmas book was The Not Very Merry Pout-Pout Fish by Deborah Diesen. Before reading we discussed and defined the setting as the time and place that a story happens. After reading, we talked about each part of the setting and Madelynn drew the time that the story took place (Christmas) and the place (in the ocean.)
Tracking Print:
Our last book was this letter M alphabet reader. Madelynn identified the picture then pointed to each word as she read. Afterwards she colored all of the pictures in.
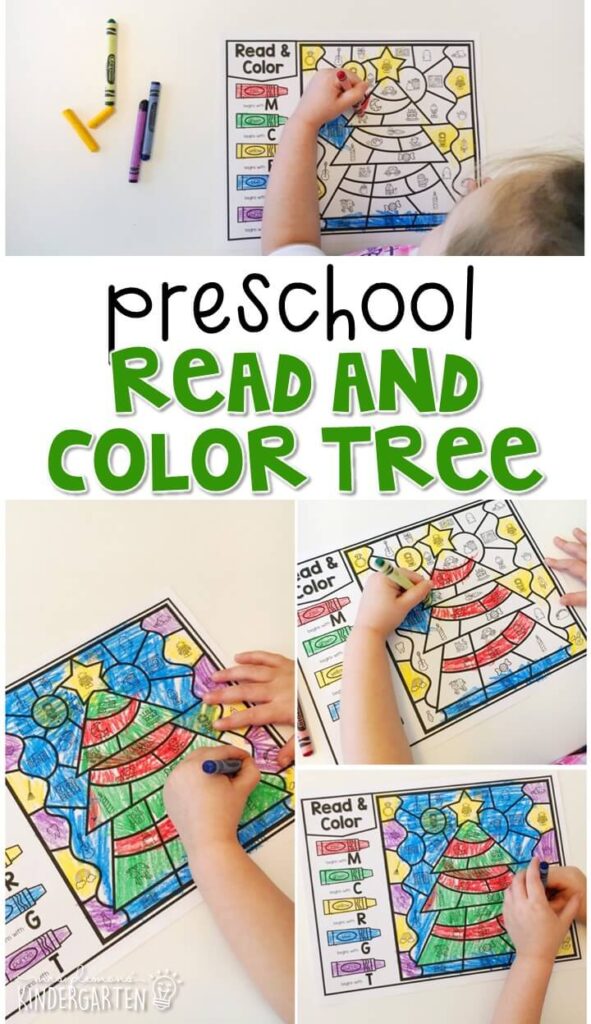
Read and Color Tree:
This week we focused on beginning sounds so we started with this color by code activity. Madelynn identified each picture, then decided what letter it started with. Knowing it was one of the 5 listed on the left side of the page helped with some of the trickier sounds, then she followed the directions to make each spot the correct color.

Mitten Sound Stamping:
Next, for more letter practice we used our dot stampers. We started out stamping inside the letter to make an M for mitten. Then Madelynn had to find the upper and lowercase M’s in the mitten, stamp them and make the “M” sound each time.
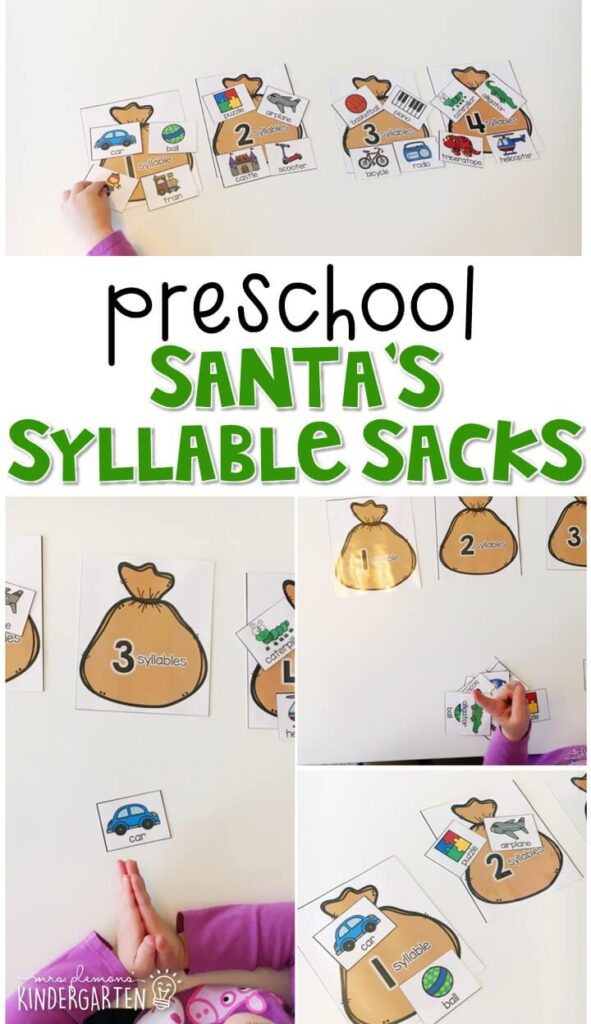
Santa’s Syllable Sacks:
For a little syllable sorting, I printed Santa sacks with the numbers 1-4 on them. Then I also printed pictures of toys. Madelynn chose a toy, and clapped the syllables to figure out which sack it belonged in. I showed her how to count the syllables by putting up one finger for each clap, and she added it to the correct sack.
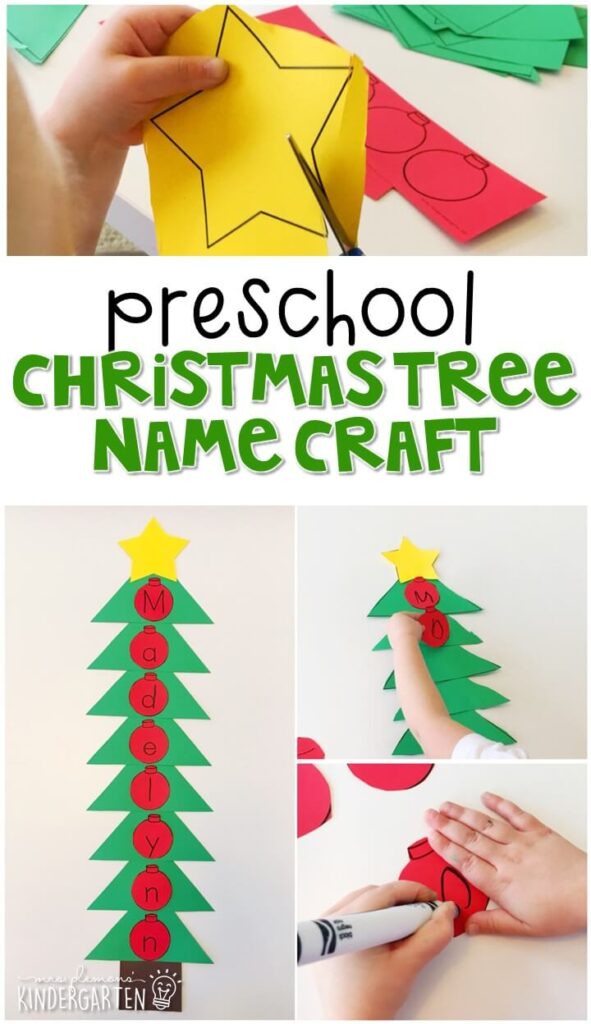
Christmas Tree Name Craft:
For this week’s name craft we created this cute Christmas tree. First Madelynn cut the tree pieces out. Then she wrote the letters in her name on each ornament. After she finished writing, she glued the tree pieces together and added the ornaments in order to spell her name.
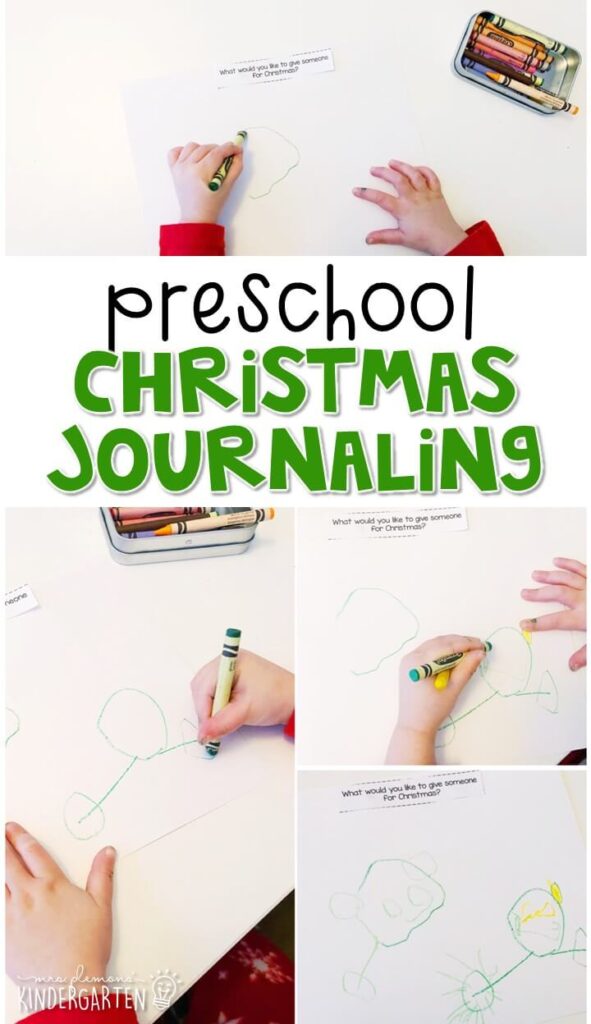
Reindeer Journal Writing:
For our journal this week Madelynn chose to draw what she would like to give someone as a gift. She decided that she wanted to give her friend Meredith a doll. So sweet 🙂
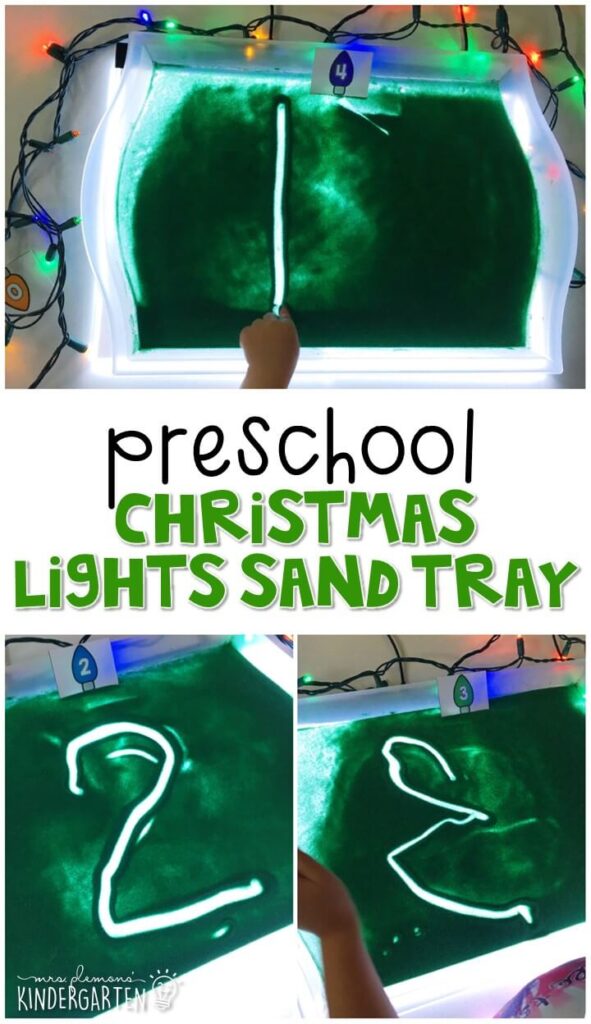
Christmas Lights Sand Tray:
Our first math activity this week was a Christmas themed writing tray. I filled our clear tray with green sand and placed it on top of 2 light pads. Then Madelynn used small light number cards as a model to write numbers in the oats with her finger.
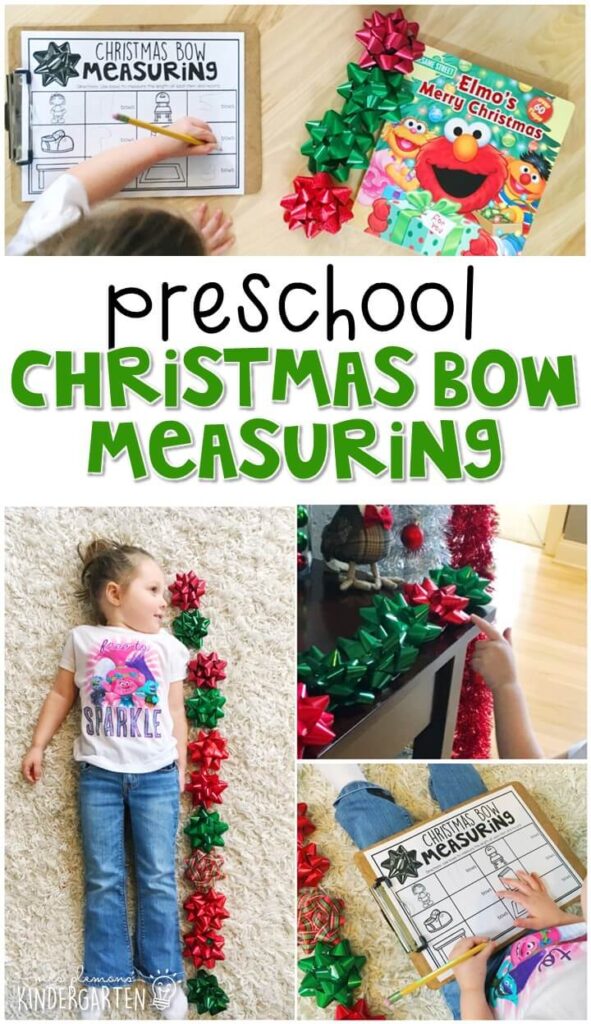
Christmas Bow Measuring:
This week we had a little fun with measurement. We started out measuring length with nonstandard units. I printed a Christmas bow measuring recording sheet and Madelynn chose an object to measure. After she found the item, she lined up present bows end to end to measure the length of the item, then recorded her answer.
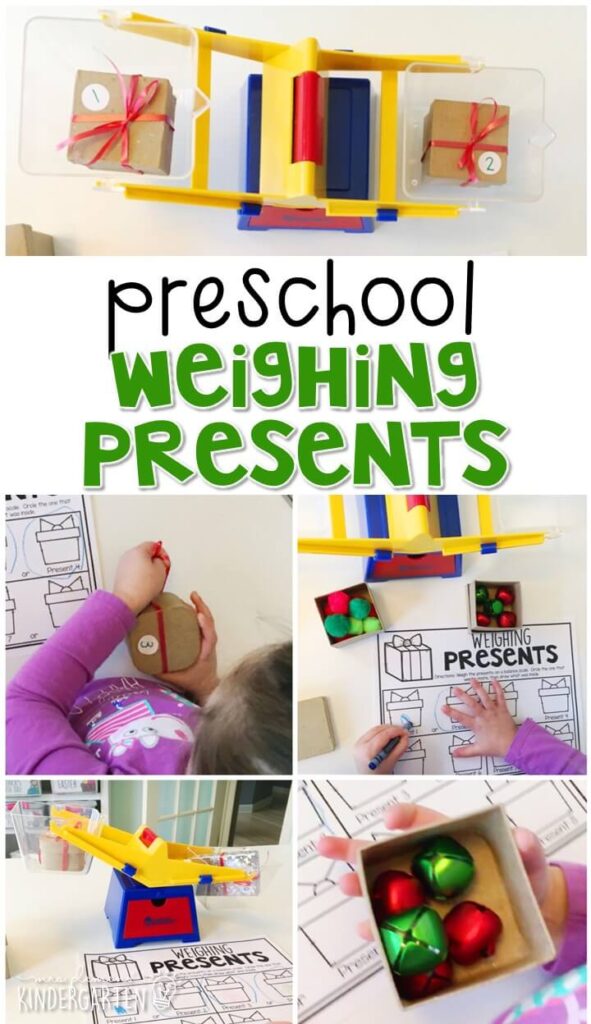
Weighing Presents:
Our next measurement activity had Madelynn exploring weight and using a balance scale. I filled 8 small boxes with objects of various weights. Then Madelynn weighed 2 boxes at a time on the balance scale. On the recording sheet, she circled the present that weighed more then, opened each box to see what was inside.
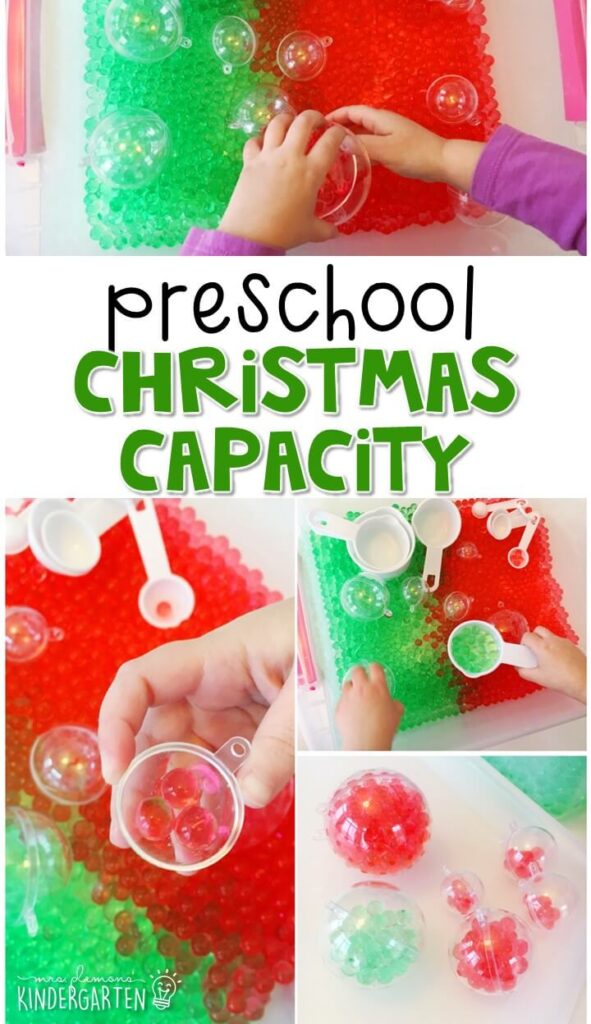
Christmas Capacity:
Capacity is always a fun measurement concept for preschoolers, because they love to fill and dump things. For our Christmas themed capacity exploration I filled our sensory bin with red and green water beads. Then I added various sizes of plastic fillable ornaments, measuring cups and spoons. Madelynn explored capacity by seeing how many water beads fit in each container. I helped her to make predictions and check to see how accurate they were as well.
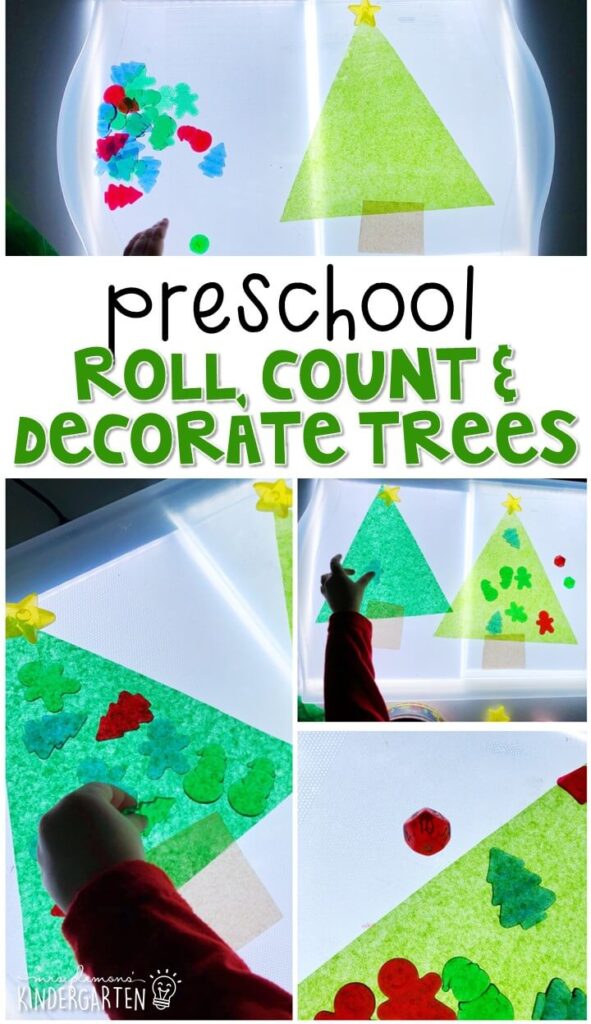
Roll, Count, and Decorate Trees:
Four our last math activity of the week we focused on number identification and counting. First, I cut out green triangles and brown rectangles from tissue paper. The I laid them on top of a clear tray and placed a light pad underneath. Madelynn rolled a 1-20 die, identified the number, and counted out the correct number of clear Christmas table scatter for ornaments.
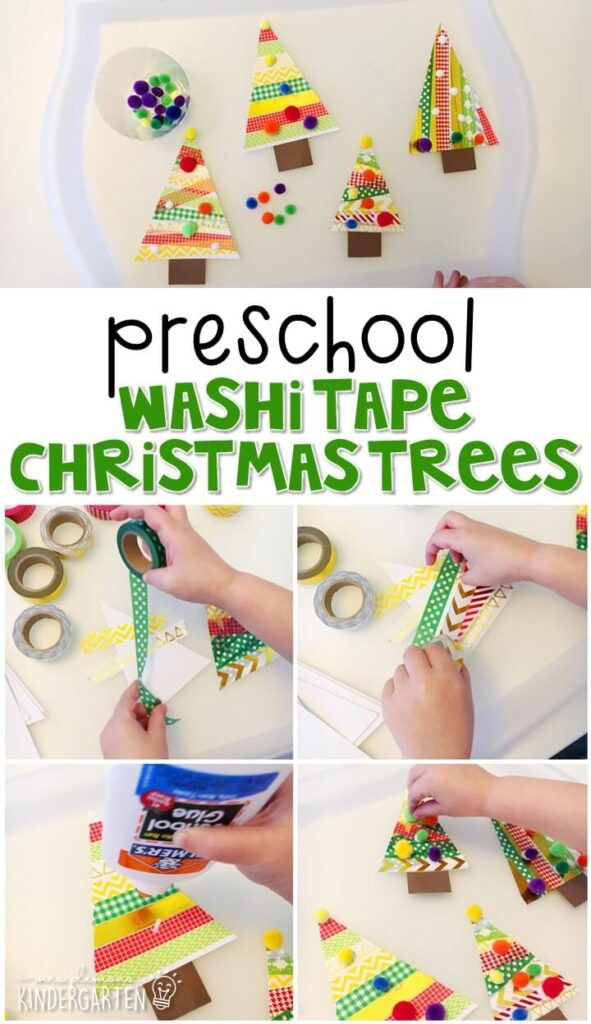
Washi Tape Christmas Trees:
This adorable little forest of trees was super easy for Madelynn to make, and she loved them because she is always asking to play with my stash of washi tape. First she cut out triangle trees in various sizes. Then she covered each one with strips of washi tape. I helped her to cut off the excess tape.
She cut and glued a brown rectangle to the bottom and added pom pom ornaments.
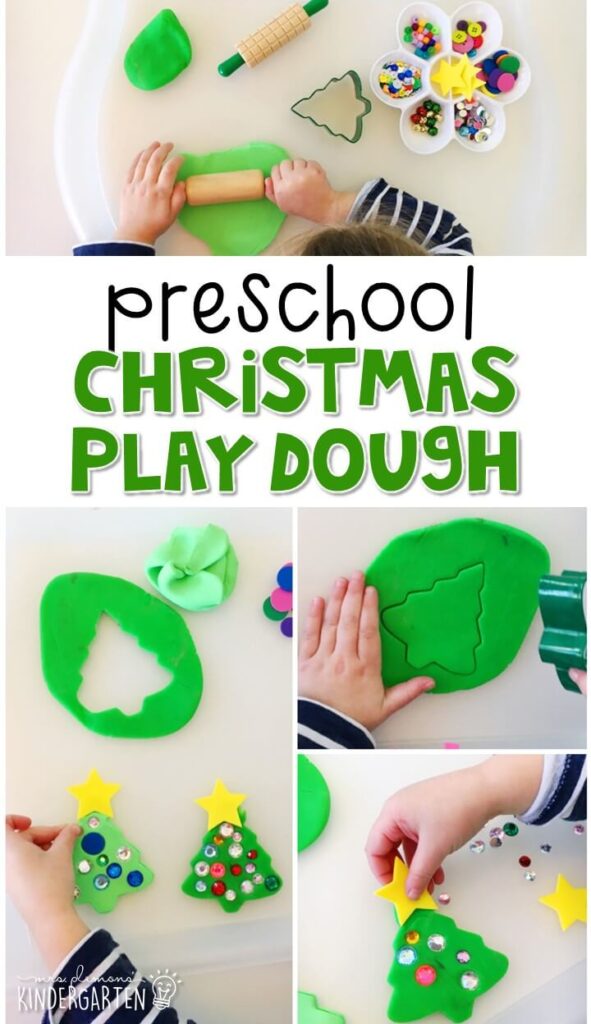
Christmas Play Dough:
On this tray: green play dough, dough roller, tree cookie cutter, foam shapes, buttons, sequins
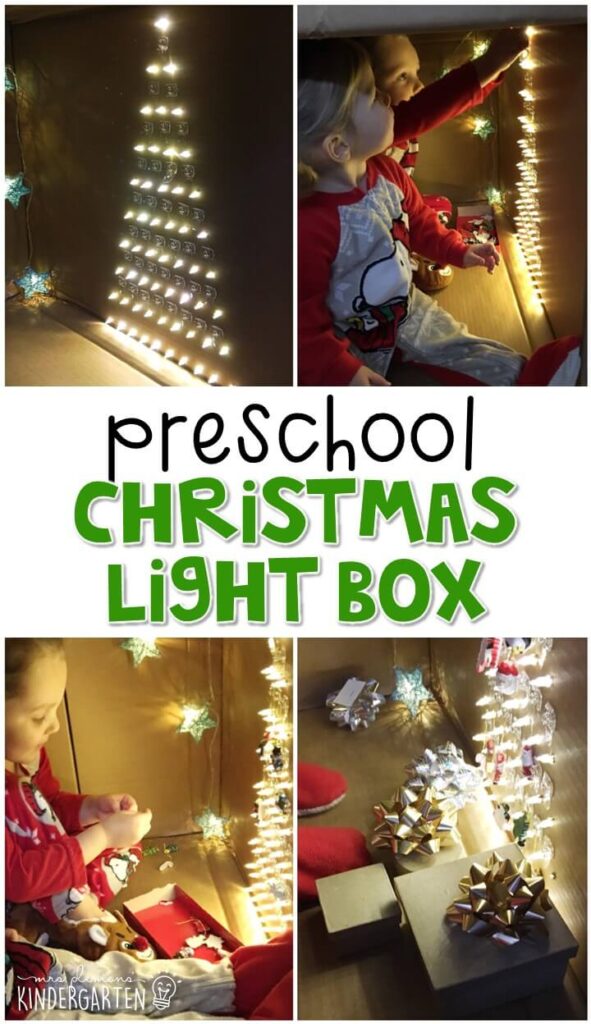
Christmas Tree Light Box:
This light box was so mesmerizing, it had my girls busy all week long. First I always save any giant boxes we get for projects like this. (You know how kids always want to play with the box right?) This was a box from one of the girls’ car seats.
To make the tree, I laid the box down so the opening was on the side and drew a large triangle on the outside of the box. Then I measured and poked holes with a screwdriver for each light. If you are a little OCD like me and want things all measured out evenly, here were my measurements:
9 inches across at the base and 18 inches tall
I used a string of 60 LED lights.
I started at the base with 10 holes across 1″ apart.
I made the next row 2″ above the first and poked 9 holes, again 1″ apart.
Then I repeated with each row 2″ above the previous one and light holes 1″ apart with one less each time.
After I poked all of the holes I pushed the lights in starting at the top so any extra lights and the plug were at the bottom. Then I added mini 3M hooks for the girls to hang mini ornaments on while playing inside.
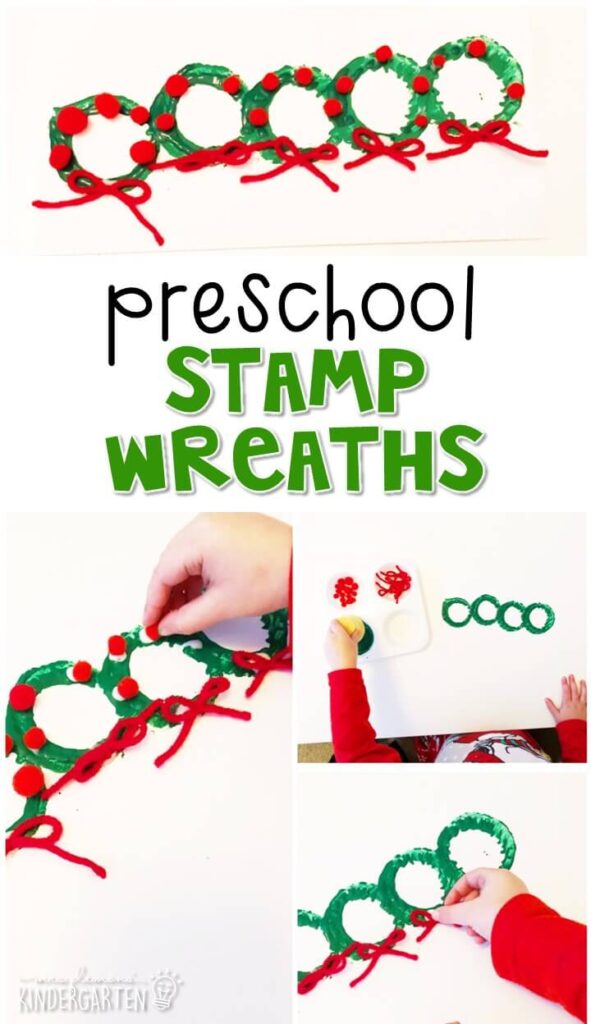
Stamp Wreaths:
I can’t be the only one that loves finding random things in our house to use as stamps right? Well for this easy craft we used a ice cream cone to stamp wreaths all over a sheet of paper. Then Madelynn glued on a few yarn bows and pom pom holly for a pretty little decoration.
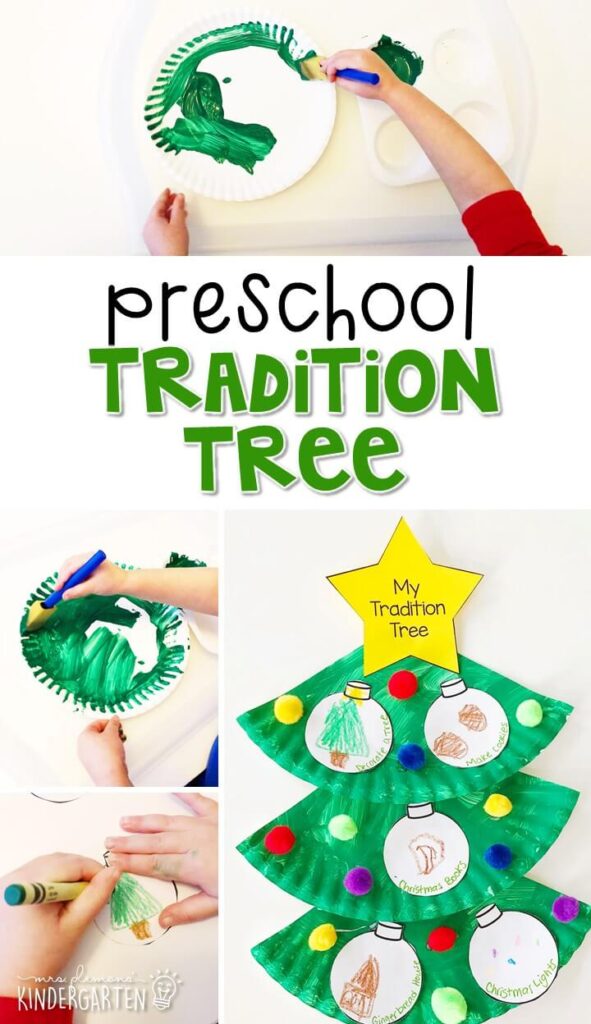
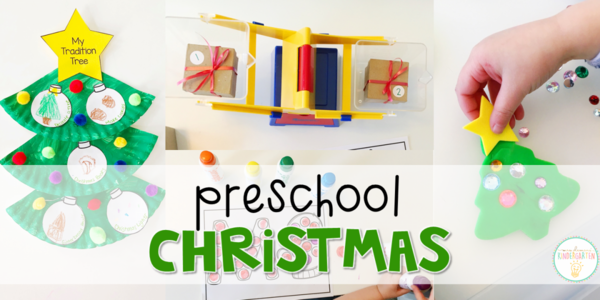
Tradition Tree:
We finished off our Christmas theme talking about traditions. We discussed how many families have special ways of celebrating holidays that they do every year. Then we made a fun craft to show our learning.
First, Madelynn painted an entire paper plate green. After it dried, I cut it into 3 equal pieces. Madelynn glued the pieces together to form a tree and added the star to the top.
Finally she drew one family tradition on each ornament and glued them to the tree as well. To add a little extra color she glued a few colorful pom poms on the tree too.
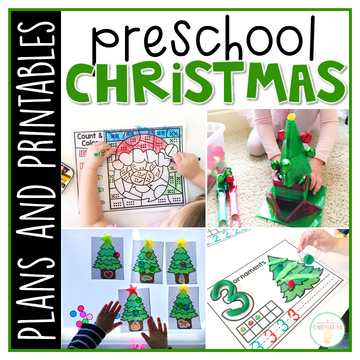
Want all of this week’s Christmas activities for tot school? You can grab them here:
On my site : Christmas Plans & Printables On TpT: Christmas Plans & Printables
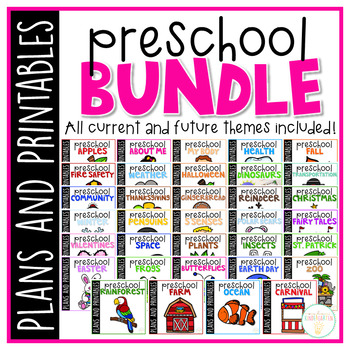
Or you can grab our entire year of themes and plans:
On my site here: Preschool Bundle On TpT here: Preschool Bundle
Then check out the rest of our 45+ themes on the Preschool Curriculum Main Page.


Leave Your Comments